
Quick Answer
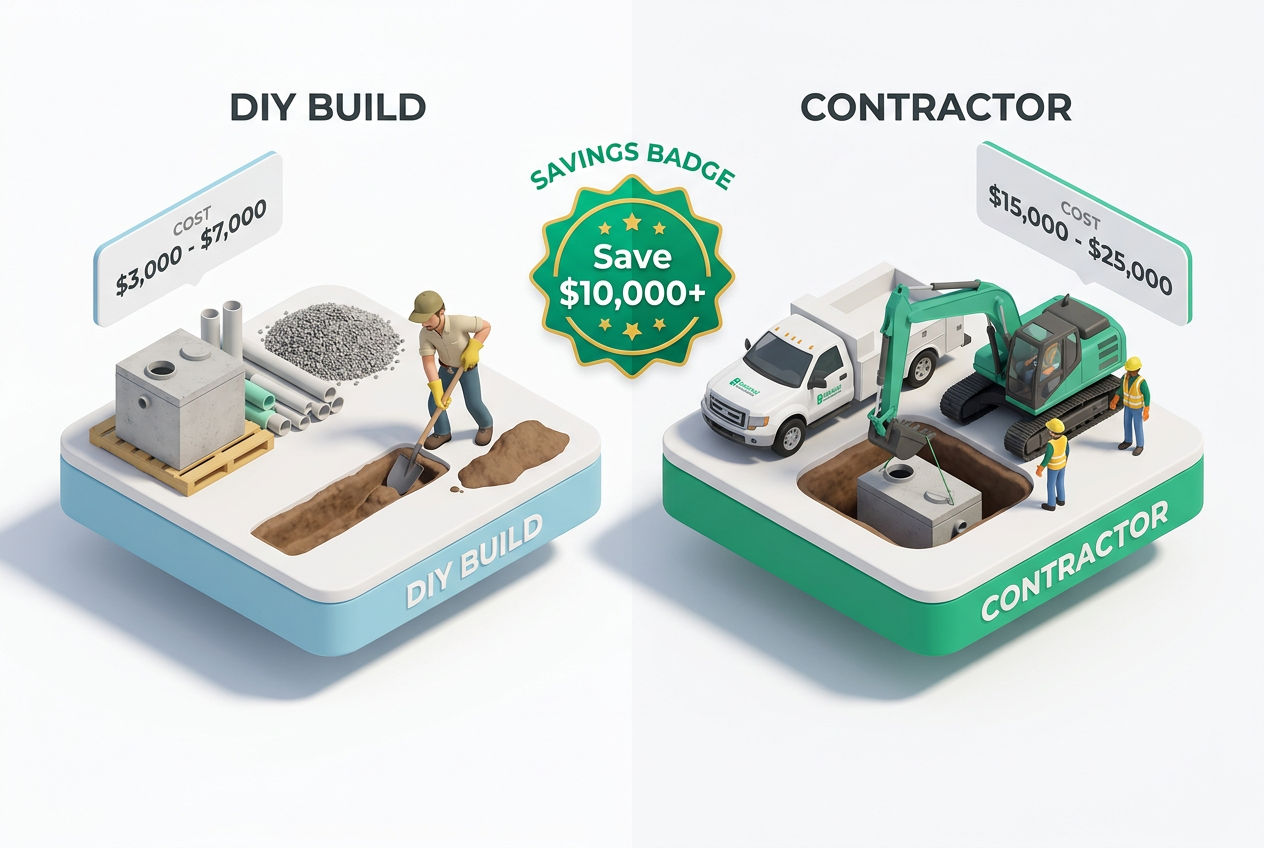
A DIY septic system is legal in many rural states with a permit, and costs $1,500–$5,000 in materials versus $7,000–$25,000 for professional installation. The process involves a percolation test, system design, permit approval, tank installation, and drain field construction — typically taking 1–3 months start to finish.
Key Takeaways
- DIY septic installation is legal in many states, but nearly every jurisdiction requires a permit and inspections — skipping them can mean fines and mandatory tear-out.
- Material costs run $1,500–$5,000; professional installation averages $10,000–$15,000 nationally.
- A percolation (perc) test and soil evaluation are required before you can design or permit a system.
- Most jurisdictions require a minimum 1,000-gallon tank for a 3-bedroom home.
- Conventional gravity-fed systems are the simplest to DIY; high water tables or poor soil absorption may force you into a mound or aerobic system that needs professional design.
Is It Legal to Build Your Own Septic System?
Whether you can legally install your own septic system depends entirely on your state and county — and the answer ranges from "yes, with a permit" to "absolutely not without a licensed contractor."
About 21 million septic systems serve roughly 60 million Americans, according to the EPA. Most of those systems were installed by licensed contractors, but a meaningful number — especially in rural areas — were owner-installed. States like Texas, Missouri, Arkansas, Tennessee, Alaska, and parts of Appalachia tend to be the most permissive. Texas, for example, delegates regulation to county-level Designated Representatives, and many rural Texas counties allow homeowners to pull their own permits and do their own work. Alaska is arguably the most permissive state in the country for DIY installation. If you're building on remote land without utility hookups, our off-grid septic systems guide covers the legal options in detail.
Contrast that with states like Florida, California, New York, and Massachusetts, where only licensed contractors can legally install a septic system. Florida requires all septic contractors to hold a Registered Septic Tank Contractor (RSTC) license through the Department of Health. In New York, designs must be stamped by a licensed engineer in most counties.
Before you touch a shovel, call your county health department. Ask three specific questions:
- Does the county allow owner-installed septic systems?
- What permits and inspections are required?
- Does the design need to be prepared or approved by a licensed engineer?
The answer to those three questions determines your path forward. For a deeper look at the rules in your state, see our septic system permit requirements guide.
How Does a Septic System Actually Work?
A conventional septic system has two main components: the septic tank and the drain field (also called a leach field or soil absorption system).
Wastewater flows from your house into the tank. Inside the tank, solids settle to the bottom and form a sludge layer. Fats, oils, and grease float to the top as a scum layer. The liquid in the middle — called effluent — exits through the outlet baffle into the drain field. Naturally occurring anaerobic bacteria inside the tank break down organic matter continuously.
In the drain field, effluent distributes through perforated pipes into gravel-filled trenches, where it slowly percolates into the surrounding soil. The soil acts as a natural biofilter, removing pathogens and nutrients before the water reaches the groundwater table.
A distribution box (D-box) sits between the tank and the drain field trenches and splits effluent flow evenly across multiple lateral lines. A properly functioning system is odorless, invisible, and largely self-managing — until it isn't.
Want a more detailed breakdown? Our what is a septic system article covers every component with diagrams. If you're replacing an aging system, it also helps to know what's already buried on your property — our guides to old septic system designs and cesspools vs septic tanks explain what earlier eras installed and why most of it no longer meets code.
Step 1 — Do You Need a Perc Test Before Installing a Septic System?
Yes. A percolation test — commonly called a perc test — is required by virtually every jurisdiction before you can get a permit or finalize a septic system design. It tells you how quickly your soil absorbs water, which determines whether a conventional drain field will work at all.
Here's how a perc test works: you (or a licensed soil evaluator, depending on your state) dig test holes 12–24 inches deep, saturate them with water, and measure how fast the water level drops. An acceptable perc rate is typically 1 inch per 60 minutes or faster, though this varies by state. Sandy soils in parts of Florida and the Southwest can absorb water almost immediately. Heavy clay soils in the Midwest or Pacific Northwest may fail entirely, requiring a mound system or engineered alternative.
Perc tests in most counties cost $200–$500 when performed by a soil scientist or licensed evaluator. Some jurisdictions allow homeowners to perform the test themselves under health department supervision. Most counties require testing during specific seasonal moisture conditions — you can't perc test frozen ground in January in Minnesota and expect useful results.
If your soil fails the perc test, you're not necessarily out of options. Our failed perc test options guide walks through mound systems, sand filters, aerobic treatment units, and other alternatives — and where nothing percs at all, incinerating toilets eliminate the drain field entirely.
Step 2 — Permits, Setbacks, and Septic System Design
Once you have perc test results, you can design the system and apply for a permit.
Minimum setback distances vary by jurisdiction, but common requirements include:
- 10 feet from the house foundation
- 50–100 feet from any drinking water well
- 10 feet from the property line
- 25–50 feet from streams, ponds, or wetlands
Tank sizing follows a standard formula. Most state codes require a minimum 1,000-gallon tank for a 3-bedroom home. The general rule: 1,000 gallons for up to 3 bedrooms, plus 250 gallons for each additional bedroom. A 5-bedroom home needs at least a 1,500-gallon tank. Smaller 500-gallon tanks and other small septic tank options are only code-legal for cabins, tiny homes, and outbuildings in most states. If you add a garbage disposal, some codes bump that up by 250 gallons automatically.
For a detailed breakdown by household size, see our septic tank size chart.
Drain field sizing depends on your perc rate and daily wastewater flow. A 3-bedroom home is typically estimated at 300–450 gallons per day. A soil with a perc rate of 30 minutes per inch requires roughly 150–200 square feet of drain field per bedroom — meaning a 3-bedroom home could need 500–700 square feet of leach field area.
Permitting typically takes 2–8 weeks. Most jurisdictions charge $200–$1,000 for the permit, which usually includes 2–3 required inspections during installation. Don't skip the inspections — in most places, you cannot backfill until an inspector approves each phase.
Step 3 — Materials and Tools You'll Need (With Costs)
Here's a realistic materials list for a conventional gravity-fed DIY septic system serving a 3-bedroom home:
| Item | Typical Cost Range | Notes |
|---|---|---|
| 1,000-gal concrete tank | $800–$2,000 | Delivered and set by supplier |
| 1,000-gal plastic/poly tank | $1,000–$2,500 | Lighter, easier to handle |
| Distribution box (D-box) | $100–$300 | Polylok or similar |
| Drain field pipe + fittings | $300–$800 | SDR-35 PVC or Infiltrator chambers |
| Drain field gravel (crushed stone) | $300–$800 | 1.5-inch clean washed stone |
| Inlet/outlet baffles or effluent filter | $50–$150 | Polylok PL-122 or equivalent |
| Perforated pipe, caps, cleanouts | $100–$300 | |
| Permit and perc test fees | $200–$1,000 | Varies widely by county |
| Total Materials | $1,850–$7,850 | Before equipment rental |
Cost data based on national supplier pricing and contractor estimates, 2024–2025.
Add $200–$600 per day for mini excavator rental if you're digging yourself. A typical installation takes 2–3 days of machine time, so budget $400–$1,800 for equipment. If you own a tractor with a backhoe attachment, you can eliminate that cost entirely.
Compare those numbers to professional installation costs — nationally, septic system installation runs $7,000–$25,000, with a national average around $10,000–$15,000 for a conventional gravity-fed system. A concrete tank is the most common choice for permanence — properly installed, it can last 40+ years. Our concrete vs. plastic septic tank comparison breaks down the trade-offs in detail.
Tools you'll need beyond equipment rental:
- Laser or builder's level (critical for proper slope — effluent won't flow uphill)
- Transit level or string line
- Pipe cutter and deburring tool
- Tamping bar and hand tamper
- Safety equipment: steel-toed boots, gloves, eye protection
- A helper — this is not a solo project
Your DIY Septic Build: Step by Step
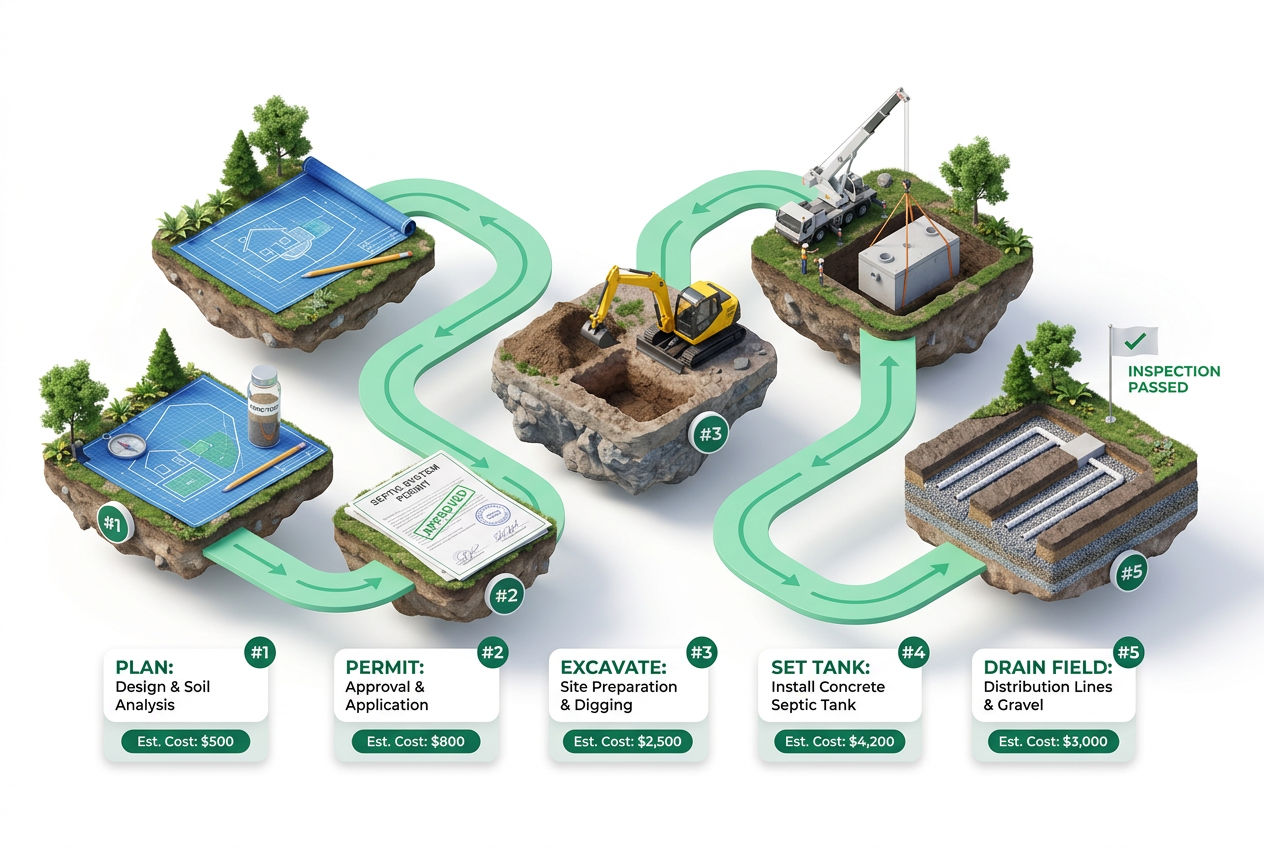
This section walks through the actual installation sequence for a conventional gravity-fed system. The exact steps apply whether you're building a cheap DIY septic system on a rural lot or installing a full system on a new build. For a deeper dive on the tank-setting phase specifically, see our how to install a septic tank guide.

DIY Septic Blueprint
Thinking about building it yourself?
The complete, plain-English plan to size, permit and install your own septic system — designed for homeowners, not contractors. Skip the $15,000–$25,000 quotes and do it right the first time.
Get the DIY Blueprint — $67 →Instant download · 8 modules + 3 bonus guides · 60-day money-back guaranteeStep 1 — Locate and Mark Everything
Mark the house cleanout, all utility lines (call 811 before you dig — it's the law), the proposed tank location, the D-box location, and the drain field trenches. Verify all setback distances with a tape measure and document them with photos for the permit inspector.
Step 2 — Excavate the Tank Pit
Dig the tank pit to the appropriate depth. Most county codes require the top of the tank to sit 4 inches to 4 feet below grade. In northern climates with deep frost lines, you may need to bury deeper — Minnesota's frost line reaches 42–60 inches, so tanks there often need to be at 48+ inches depth. A 1,000-gallon concrete tank is roughly 8 feet long x 5 feet wide x 5 feet tall, so your pit needs to be larger to allow working room and proper bedding.
Bed the pit with 4–6 inches of compacted sand or pea gravel. This prevents settling and cracking.
Step 3 — Set the Tank
A 1,000-gallon concrete tank weighs 8,500–9,000 pounds. You cannot muscle this into place — you need the delivery truck's crane, a rented crane, or an excavator with a lifting attachment. Plastic poly tanks (around 300–400 pounds empty) are far more manageable.
Level the tank carefully. A 1/8-inch per foot slope on the inlet pipe from the house is standard — enough for gravity flow, not so steep that liquids race ahead of solids. Confirm the tank is plumb and level front-to-back.
Step 4 — Connect the Inlet and Outlet
Run 4-inch Schedule 40 or SDR-35 PVC pipe from the house cleanout to the tank inlet. Maintain that 1/8-inch per foot fall. Install the inlet baffle (or tee) inside the tank — this directs incoming waste downward to prevent short-circuiting. Install the outlet baffle or an effluent filter like the Polylok PL-122, which catches solids and protects the drain field.
Step 5 — Install the Distribution Box
Run the outlet pipe from the tank to the D-box with the same 1/8-inch per foot fall. The D-box (typically a 4-port or 6-port Polylok unit) levels effluent flow and distributes it equally across all drain field laterals. The D-box must be perfectly level — even 1/4-inch off and effluent floods one lateral while the others starve.
For more on D-box installation, see our septic distribution box guide.
Step 6 — Excavate the Drain Field Trenches
Standard drain field trenches are 1–3 feet wide, 2–5 feet deep, and 30–100+ feet long, depending on your soil's absorption rate and the calculated system size. Trenches must be level along their length — not sloped. Space multiple trenches at least 6 feet apart (center to center).
Do not excavate in wet conditions. Saturated soil compacts and smears under machinery, destroying the very absorption capacity you need. Our drain field installation guide has detailed sizing charts based on perc test results.
Step 7 — Install the Drain Field
Place 6–12 inches of 1.5-inch clean washed stone in the bottom of each trench. Lay perforated 4-inch PVC pipe (or Infiltrator Quick4 chambers, which eliminate gravel entirely) on the stone bed. Cap the ends. Cover with another 2 inches of stone, then wrap with geotextile filter fabric to prevent soil migration. Backfill with native soil, mounding slightly to account for settling — but leave access to the D-box.
Infiltrator chamber systems from Infiltrator Water Technologies have become popular for DIY builders because they're lighter than pipe-and-gravel, faster to install, and require less trench depth. One standard Quick4 chamber replaces about 2 linear feet of gravel trench.
Step 8 — Final Connections and Riser Installation
Install concrete or plastic risers from the tank's access ports to just below grade level. This gives you future pump-out access without digging. Polylok snap-lock lids are a popular choice — they're child-resistant and locking. Learn more about long-term access planning in our septic tank risers guide.
Getting Your System Inspected and Approved
Most jurisdictions require 2–3 inspections during a DIY septic installation:
- Pre-installation inspection — the inspector verifies layout, setbacks, and tank location before excavation begins
- Mid-installation inspection — typically happens before backfilling, so the inspector can see tank placement, pipe slopes, baffles, D-box level, and drain field construction
- Final inspection — confirms everything is covered and the system is operational
Do not backfill any component before the required inspection. If an inspector can't verify what's underground, they may require you to uncover everything. That's an expensive mistake.
Once approved, you'll receive a certificate of completion (sometimes called a permit sign-off) that you should keep with your property records. If you ever sell the house, a buyer's inspector will want to see it. For more on what inspectors look for, see our septic inspection process guide.
Maintenance After You Build Your Own Septic System
Building the system is only half the equation. A neglected septic system fails in 10–15 years. A maintained one lasts 20–40 years — and concrete tanks regularly hit 40+ years.
The non-negotiables:
- Pump the tank every 3–5 years. According to the EPA, this is the single most important maintenance task. A 1,000-gallon tank serving a 4-person household typically needs pumping every 3–4 years. Add a garbage disposal and that drops to every 2 years because of the additional solids load. Find qualified pumpers through our septic pumping services directory.
- Protect the drain field. Never drive vehicles over the leach field — compaction destroys absorption capacity. Keep deep-rooted trees at least 20–30 feet away. Our what is a drain field article explains why this matters.
- Watch what goes down the drain. Flushable wipes, grease, antibacterial soaps, and harsh chemicals kill the anaerobic bacteria that make your system work. See our guide on what kills septic bacteria for the full list.
- Annual visual check. Walk the drain field after heavy rain. Wet spots, lush green grass, or odors indicate a problem developing. Catching issues early is far cheaper than a full drain field replacement.
For a full maintenance schedule and seasonal tips, our septic tank maintenance guide covers everything in one place.
What Is the Cheapest Septic System to Install?
The cheapest DIY septic system that meets code in most jurisdictions is a conventional gravity-fed system with a plastic polyethylene tank and Infiltrator chamber drain field.
Here's a worked example for a rural 3-bedroom home in a DIY-permissive county in Missouri:
- 1,000-gallon poly tank (Norweco or equivalent): $1,100
- Infiltrator Quick4 Standard chambers (20 units): $600
- D-box (Polylok 4-outlet): $150
- PVC pipe, fittings, effluent filter: $250
- Gravel (for pipe runs, not chambers): $200
- Permit and perc test: $350
- Mini excavator rental (2 days): $700
- Total: approximately $3,350
Compare that to a contractor quote for the same system in the same county: $8,500–$12,000. The savings are real — but only if your soil and layout allow a straightforward conventional system.
Mound systems, aerobic treatment units, and sand filter systems cost more — often $10,000–$30,000 even for DIY material costs — because they require specialized components, engineered designs, and electrical work. Our cheapest septic system guide covers every option with cost comparisons.
When Should You Hire a Professional Instead?
DIY septic installation makes sense for: a capable homeowner on rural property, with permissive local regulations, flat accessible terrain, good soil absorption, and a straightforward conventional gravity-fed design.
It stops making sense in several situations:
- Your perc test failed or your soil is marginal — engineered alternative septic systems like mound systems, aerobic treatment units, or sand filters need professional design to function and get permitted.
- High water table — Florida, coastal Georgia, the Gulf Coast, and low-lying areas often require elevated mound or aerobic systems, or in seasonal-use cases an above-ground septic tank. Installing a conventional system in high-water-table soil creates a public health hazard.
- Complex lot — steep slopes, rock near the surface, or tight setback constraints require design expertise to solve legally.
- State requires a licensed contractor — in California, Florida, New York, Massachusetts, and many other states, DIY installation is simply illegal regardless of your skill level.
- You're not comfortable with the excavation — a misplaced tank or improper pipe slope can cause sewage backups in your home within months.
Picture this: you've built the system yourself, saved $8,000, and three years later you're listing the house for sale. The buyer's inspector — or your county health department — discovers the D-box is 40 feet instead of 50 feet from the well, or the outlet baffle is missing. Now you're facing a mandatory upgrade before the sale can close. That $8,000 savings evaporates quickly.
If any of those scenarios apply to you, the smartest move is connecting with a licensed installer in your area. Find septic installation professionals near you through the SepticTankHub directory.
Regional Variations: Does Your Location Change the Process?
Absolutely. Here's what matters most by region:
Southeast (FL, GA, AL, SC): High water tables are common across low-lying coastal areas. Conventional systems often can't be installed — aerobic systems or mound systems are required. Sandy soils in Central Florida perc extremely fast, which simplifies drain field sizing, but regulations are strict. Check Florida's septic regulations before planning.
Northeast (NY, PA, ME, VT): Frost depth requirements mean tanks must be buried below the frost line or insulated. The installation season is shorter — typically May through October. State regulations are among the strictest in the country; many require licensed contractors. New York and Massachusetts generally do not permit owner-installed systems.
Midwest (OH, IN, MO, MN): Clay-heavy soils are common and frequently fail perc tests or produce marginal results, pushing homeowners toward chambered or mound systems. Rural Missouri and southern Illinois tend to be more DIY-permissive than suburban counties, and several Plains states also permit low-cost septic lagoon systems. Minnesota requires all systems to meet strict MPCA standards.
Southwest (AZ, NM, TX): Rocky caliche soils in Arizona and New Mexico make excavation significantly harder and more expensive — plan for higher equipment costs. Texas is the most permissive large state for DIY installation, but regulations vary county by county.
Pacific Northwest (OR, WA): Heavy annual rainfall means drain fields need more square footage. Oregon and Washington have strict environmental regulations and most counties require licensed designers and contractors.
Related: how to build a septic system
Sources & Methodology
This article draws on the following primary sources:
- U.S. Environmental Protection Agency (EPA) — Septic system statistics, maintenance recommendations, and system design guidance. epa.gov/septic
- National Onsite Wastewater Recycling Association (NOWRA) — Industry standards for septic system design and installation. nowra.org
- State health department regulations — Referenced individually by state throughout; regulations accessed via official state health department websites.
- Infiltrator Water Technologies — Product specifications for Quick4 chamber systems and installation requirements.
- Polylok, Inc. — Product specifications for PL-122 effluent filters and distribution box models.
Cost data reflects national supplier pricing and regional contractor estimates collected in 2024–2025. Local costs vary significantly — always get local quotes before budgeting a project.
Free download
Not ready for the Blueprint? Start free.
Grab the free DIY Septic Planning Kit — the permit-first checklist, perc-test cheat sheet, and sizing tables that keep your build from getting red-tagged.
Was this article helpful?
Frequently Asked Questions
Recommended Resources
📖 Related Articles
- Septic System Permit Cost & State Requirements (2026 Guide)
- What Is a Septic System? How It Works (Visual Guide)
- Septic System Design: Layouts, Drawings & Requirements
- Land Failed the Perc Test? Here Are Your Options
- Septic Tank Sizes & Dimensions Chart (by Bedrooms)
- Concrete vs Plastic Septic Tanks: Which Is Better?
- What Is a Distribution Box in a Septic System?
- How to Install a Septic Drain Field
- How to Install Septic Tank Risers (and Why You Should)
- What Happens During a Septic Inspection?
- What Is a Drain Field? (And How Does It Work?)
- What Kills Septic Tank Bacteria? (14 Things to Avoid)
- The Complete Septic Tank Maintenance Guide
- What Is the Cheapest Septic System? (Ranked by Total Cost)
💰 Cost Guides
Find Septic Professionals Near You
Compare licensed, verified septic companies by area — top county markets and cities below, or browse all 50 states.
County markets
Popular cities
