

Quick Answer
An RV toilet is a compact waste-management fixture designed for mobile use. Unlike a home toilet, it sends waste directly into an onboard black water holding tank rather than a municipal sewer or septic line. The five main types — gravity flush, cassette, macerating, composting, and dry flush — each suit different rigs, travel styles, and budgets.
Key Takeaways
- Gravity flush toilets are the most common RV toilet, costing $90–$300, and work much like a home toilet minus the siphon trap.
- Black water tanks typically hold 15–50 gallons; a couple camping full-time will dump every 3–5 days.
- Composting toilets ($800–$2,000+) use zero water and are popular among van-lifers and boondockers on the Pacific Coast.
- A standard RV toilet replacement takes 30–90 minutes DIY; professional labor runs $100–$300 extra.
- RV black water can connect to a home septic system — but only with the right setup and local approval.
How Does an RV Toilet Work Differently From a Home Toilet?
An RV toilet skips the siphon trap and sewage pipe that home toilets rely on. Instead, a foot pedal or hand lever opens a rubber ball valve or blade valve in the bowl's base, dropping waste directly into the black water holding tank below. Press the pedal partway and you get water to rinse the bowl. Press it fully and the valve opens. That direct-drop design is the core difference.
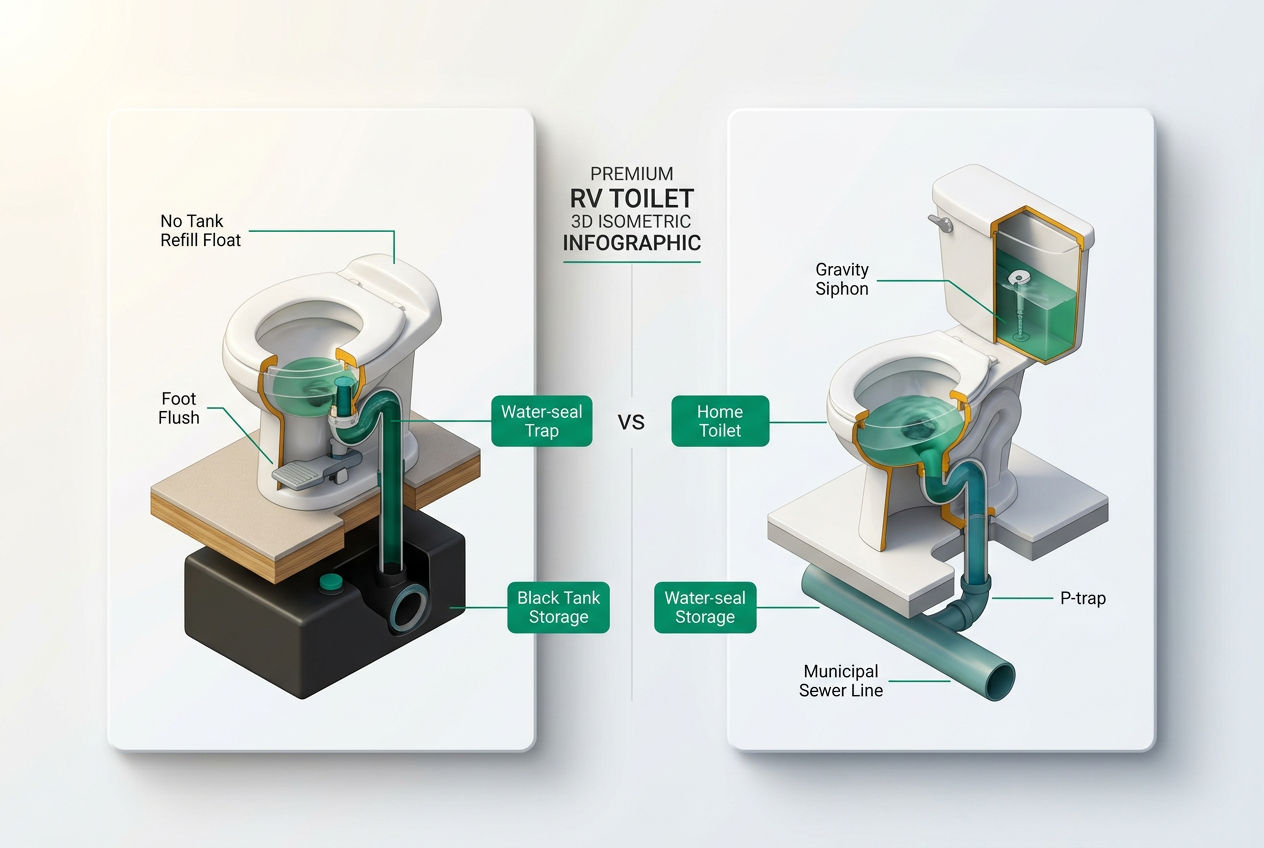
Your home toilet uses a water-filled trap to block sewer gases and a siphon action to pull waste into the drain line. An RV toilet uses a rubber seal — the rv toilet seal — to block tank odors when the valve is closed. No water trap. No siphon. Just a valve and a tank.
Because of this, the rv toilet valve and its seal do the heavy lifting. A cracked or dried-out seal lets black water tank gases seep back into the bathroom. You'll smell it immediately. Seal replacement is the single most common RV toilet maintenance task, and it costs just $10–$30 in parts. (More on that in the maintenance section.)
Water use per flush is also dramatically lower than at home. A standard gravity flush RV toilet uses roughly 0.5–1 gallon per full flush, compared to 1.28–1.6 gallons for a modern residential low-flow toilet. That efficiency matters when your fresh water tank has limits.
What Are the Different Types of RV Toilets?
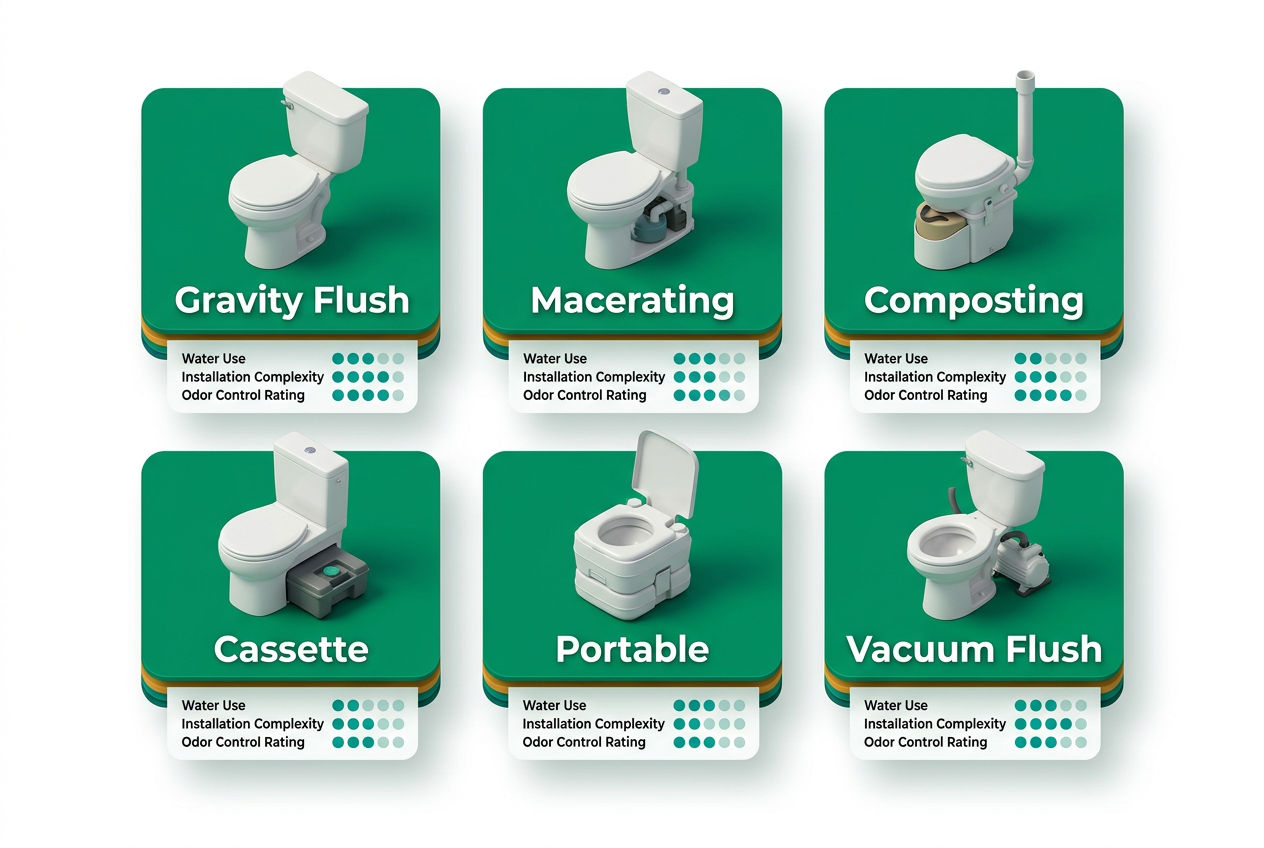
Five types dominate the RV market. They differ in how they handle waste, how much water they use, what they cost, and which rigs they fit. Here's a plain-language breakdown.
Gravity Flush RV Toilet
This is the default toilet in the vast majority of Class A, Class B, and Class C motorhomes — and in most travel trailers with a dedicated bathroom. Waste falls by gravity through the foot-pedal valve directly into the rv black water tank below. Thetford and Dometic manufacture the majority of these units sold in the U.S., and they control most of the OEM and aftermarket market.
Price range: $90–$300 Water use: 0.5–1 gallon per flush Best for: Full-size RVs with a permanent black tank
The Thetford Aqua-Magic Style II and the Dometic 310 Series are two of the most commonly replaced units. Both use the standard 7" × 10.5" floor bolt pattern, which matters a lot when you're shopping for an rv toilet replacement — more on that shortly.
Seat height runs 13.5"–18" depending on the model. If you have knee or hip issues, look for "comfort height" models that hit the 17"–18" range, similar to an ADA-compliant residential toilet.
Macerating RV Toilet
A macerating toilet adds a grinding pump that liquefies waste before sending it to the holding tank. This lets you install the toilet farther from the tank — useful in larger coaches where the bathroom isn't directly above the black tank.
Price range: $500–$1,200 Water use: ~0.5 gallon per flush Best for: Large Class A motorhomes, custom coach conversions
The flush feels more like a home toilet because water enters from a rim rather than a single jet. The tradeoff: the grinding pump is a mechanical part that can fail, and repairs are more complex than swapping a $15 seal.
RV Cassette Toilet
A cassette toilet has a fixed upper section with a small fresh water tank and a removable lower cassette — essentially a sealed waste cartridge that slides out through an exterior service door on the RV's sidewall. You pull the cassette, carry it to a dump point (a campground restroom, dump station, or even a residential toilet for small volumes), empty it, rinse it, and slide it back.
Cassette tank capacity: 4–5.5 gallons, roughly 50 flushes before it needs emptying Price range: $150–$500 Best for: Campervans, small trailers, pop-ups, and Sprinter vans
The rv cassette toilet is extremely popular in Europe and increasingly common in the van-life segment in the U.S. Because there's no large black tank plumbing, these work in smaller rigs where running 3" ABS drain lines isn't practical. Thetford's C-200 and C-400 series are the dominant options.
RV Composting Toilet
A composting toilet separates liquids from solids and uses peat moss, coco coir, or similar bulking material to break down solid waste aerobically. When managed correctly, the solid chamber produces a material similar to garden compost — though state disposal regulations vary significantly, and some jurisdictions require licensed waste haulers regardless of composition.
Price range: $800–$2,000+ Water use: 0 gallons — completely waterless Best for: Off-grid boondockers, van builds, eco-conscious RVers
Composting toilets are disproportionately popular in the Pacific Coast van-life corridor — California, Oregon, and Washington — where boondocking culture and environmental consciousness overlap. Nature's Head and Air Head are the two most recognized brands in the RV composting space.
Liquid waste goes into a separate bottle that needs emptying every 2–3 days for full-time solo use, or daily for a couple. Solid waste composting takes longer — typically 3–4 weeks before a typical cartridge fills, depending on use.
For a deeper look, see our full guide on rv composting toilets and the broader composting toilet guide.
Dry Flush RV Toilet
A dry flush toilet uses sealed mylar cartridge bags. Each flush wraps and seals the waste in a layer of bag material, essentially packaging it for disposal in a regular trash can. No water. No composting. No holding tank.
Price range: $500–$700 for the unit Cartridge cost: $18–$25 per cartridge, each handling roughly 15–17 flushes Best for: Remote use where dump stations are unavailable and composting isn't practical
The Laveo by Dry Flush is the primary player here. The ongoing cartridge cost adds up fast for full-timers — a couple doing 6 flushes per day burns through a cartridge in under 3 days, running $100–$175 per month in consumables. This type makes more sense for weekend warriors than full-time travelers.
Portable RV Toilet
A portable toilet is a standalone, self-contained unit with a small flush mechanism and a sealed waste tank. Think of a more sophisticated version of a festival porta-potty, scaled for personal use. They require no installation and can be used in a tent, a truck bed, or a rig with no built-in bathroom.
Price range: $30–$150 Capacity: 2.5–5.3 gallon waste tank Best for: Tent campers, small vans, emergency backup
Thetford's Porta Potti 365 is the classic example. These don't integrate with any plumbing — you empty the waste tank at a dump station or restroom.
RV Toilet Types Compared
| Type | Price Range | Water per Flush | Black Tank Needed? | Best For |
|---|---|---|---|---|
| Gravity Flush | $90–$300 | 0.5–1 gal | Yes | Full-size RVs |
| Macerating | $500–$1,200 | ~0.5 gal | Yes | Large coaches |
| Cassette | $150–$500 | 0.25–0.5 gal | No (cassette) | Vans, small trailers |
| Composting | $800–$2,000+ | 0 gal | No | Off-grid boondockers |
| Dry Flush | $500–$700 + cartridges | 0 gal | No | Remote camping |
| Portable | $30–$150 | Minimal | No | Emergency/backup |

Sources: Manufacturer pricing from Thetford, Dometic, Nature's Head, and Laveo; RVIA market data 2023.
What Is the Best RV Toilet to Buy?
The right toilet for your rig comes down to three variables: where you park, how often you access a dump station, and how much plumbing you already have in place. Work through those three factors and the answer usually surfaces on its own.
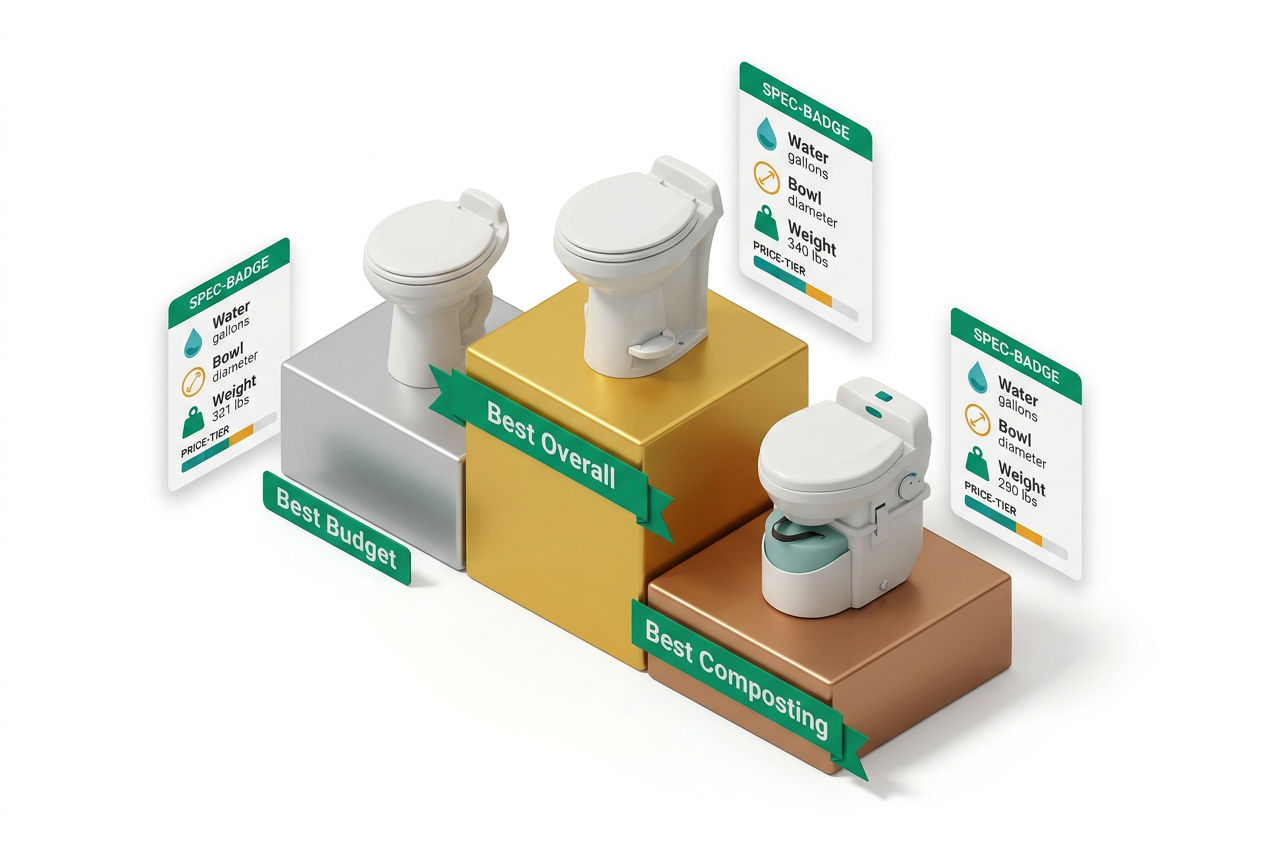
If you own a full-size motorhome or travel trailer with an existing black water tank and standard plumbing, a gravity flush toilet is the smart choice. Spend $150–$250 on a mid-tier Thetford or Dometic unit. You'll get a toilet that your dealer can service, parts are everywhere, and replacement is a 30-minute DIY job.
If you're building out a Sprinter van or small camper with no room for a 50-gallon black tank, a cassette toilet gives you the best balance of hygiene and practicality. The cassette empties at any campground restroom, no dump station required.
If you boondock more than 80% of the time and want to eliminate black tank management entirely, a composting toilet is worth the $800–$2,000 investment. The Nature's Head and Air Head both have strong track records over 5–10 years of full-time use.
If you're a weekend warrior who camps in remote areas without dump stations and doesn't want to maintain a composting system, a dry flush toilet is a legitimate option — just budget for cartridge costs before you commit.
For a side-by-side product breakdown, see our Dometic vs. Thetford rv toilet comparison.
Not sure which toilet type fits your setup? Use the RV Toilet Selector below — enter your rig type, camping style, water access, and budget to get a matched recommendation in under 60 seconds.
How Much Does RV Toilet Replacement Cost?
RV toilet replacement costs depend on the toilet type you're buying and whether you do the work yourself or hire a technician.
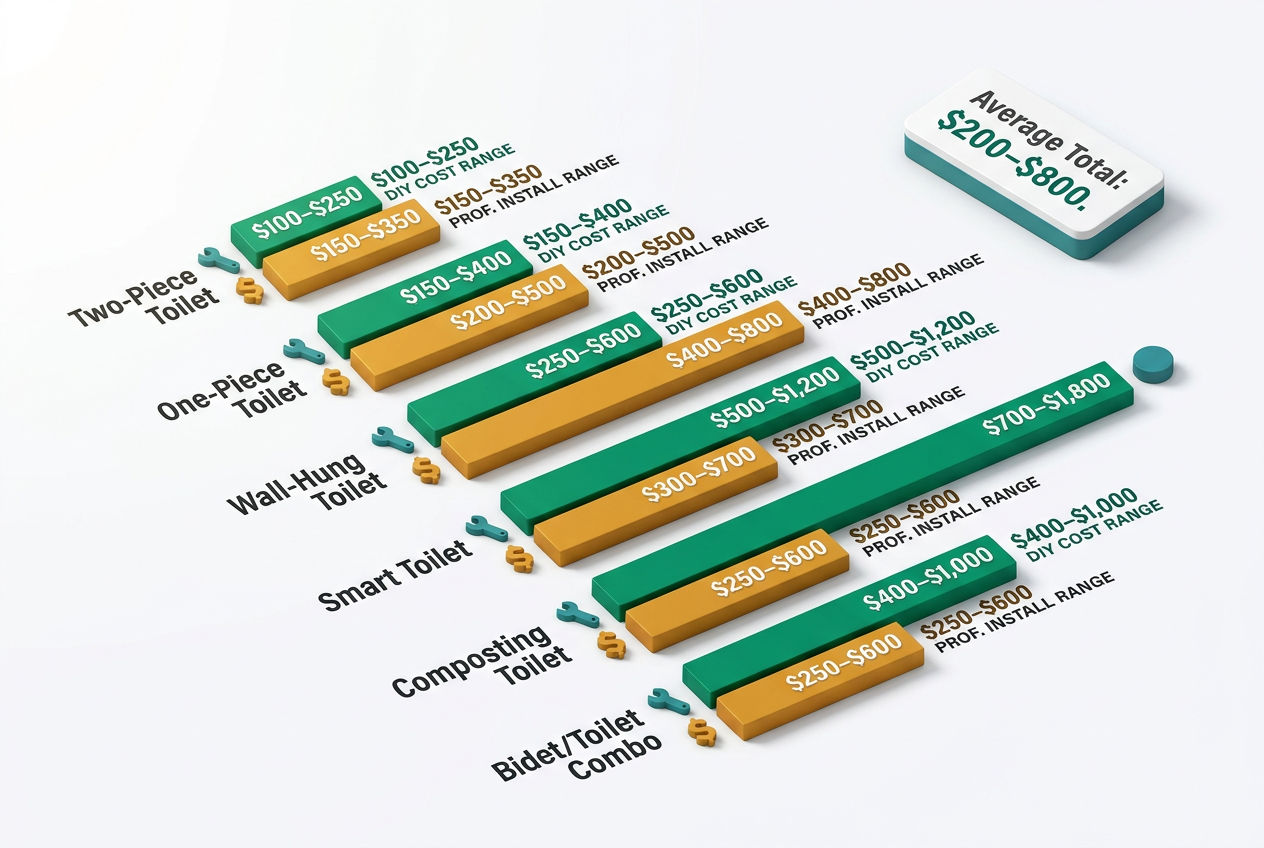
DIY replacement — gravity flush toilet:
- Toilet unit: $90–$300
- Replacement seal kit (if needed simultaneously): $10–$30
- Total: $100–$330
- Time: 30–90 minutes
Professional installation — gravity flush toilet:
- Toilet unit: $90–$300
- Labor: $100–$300 (1–2 hours at $75–$150/hr shop rate)
- Total: $190–$600
Worked example: Say you're replacing the original toilet in a 2015 Jayco travel trailer. The existing unit is a Thetford Aqua-Magic Style II with a failing ball valve seal. You order a Dometic 310 Series as the replacement ($225 shipped) and a Thetford seal kit for the old unit as a backup ($18). With basic tools — an adjustable wrench, a bucket, and a rag you don't care about — the swap takes about 45 minutes: disconnect the water line, unbolt two floor bolts, lift the old unit, set the new one, reconnect. Total out-of-pocket: $243. A shop doing the same job would run $375–$500 with labor.
The floor bolt pattern is the critical compatibility check. Most gravity flush RV toilets use a standard 7" × 10.5" pattern, but measure yours before ordering. A mismatched bolt pattern means buying an adapter flange or returning the unit.
For a full walkthrough, see our rv toilet replacement guide.
How Often Do You Have to Empty an RV Toilet's Black Tank?
Dump frequency depends on your tank size, the number of occupants, and how liberally you flush. Here's the math worked out explicitly so you can calculate your own schedule.
Standard calculation:
- Tank size: 30 gallons (common mid-size travel trailer)
- Occupants: 2 adults
- Flushes per day: 8 total (4 per person)
- Water per flush: 0.75 gallons (mid-range gravity flush)
- Other black tank inputs (toilet paper, minimal liquid): adds ~10% volume
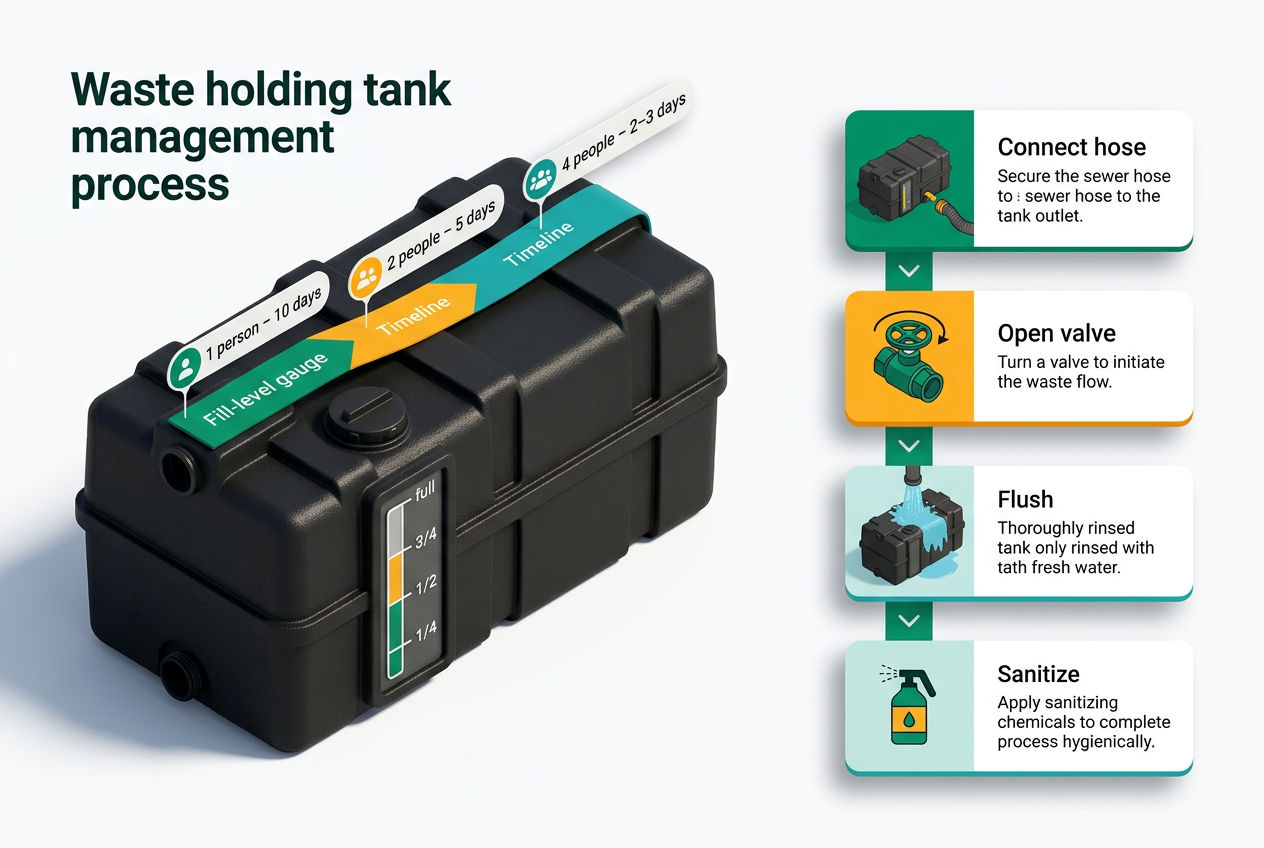
Daily black tank addition: 8 × 0.75 × 1.10 = 6.6 gallons/day Days until full at 30 gallons: 30 ÷ 6.6 = ~4.5 days
The general rule — dump every 3–5 days for two adults — matches this math. Solo travelers in the same rig can stretch to 7–9 days. Four adults cut it to 2–3 days.
The 2/3 rule: Don't wait until the tank is completely full. Dump when the tank reaches two-thirds capacity. A too-full black tank increases the risk of sensor fouling and, in hot weather, accelerates odor breakthrough past the toilet seal.
Cassette toilet users work on a much tighter cycle. A 4.5-gallon cassette (Thetford C-200) at 8 flushes per day fills in roughly 3 days for two adults — possibly faster depending on flush volume.
For more on managing your holding tank, see our rv holding tank guide.
How Do You Maintain an RV Toilet?
The Septic Owner's Handbook
Own a septic system? Get the manual nobody gave you.
How it works, the golden rules, the maintenance calendar, and a warning-signs decoder for every gurgle, smell, and wet spot — so small issues never become $15,000 ones.
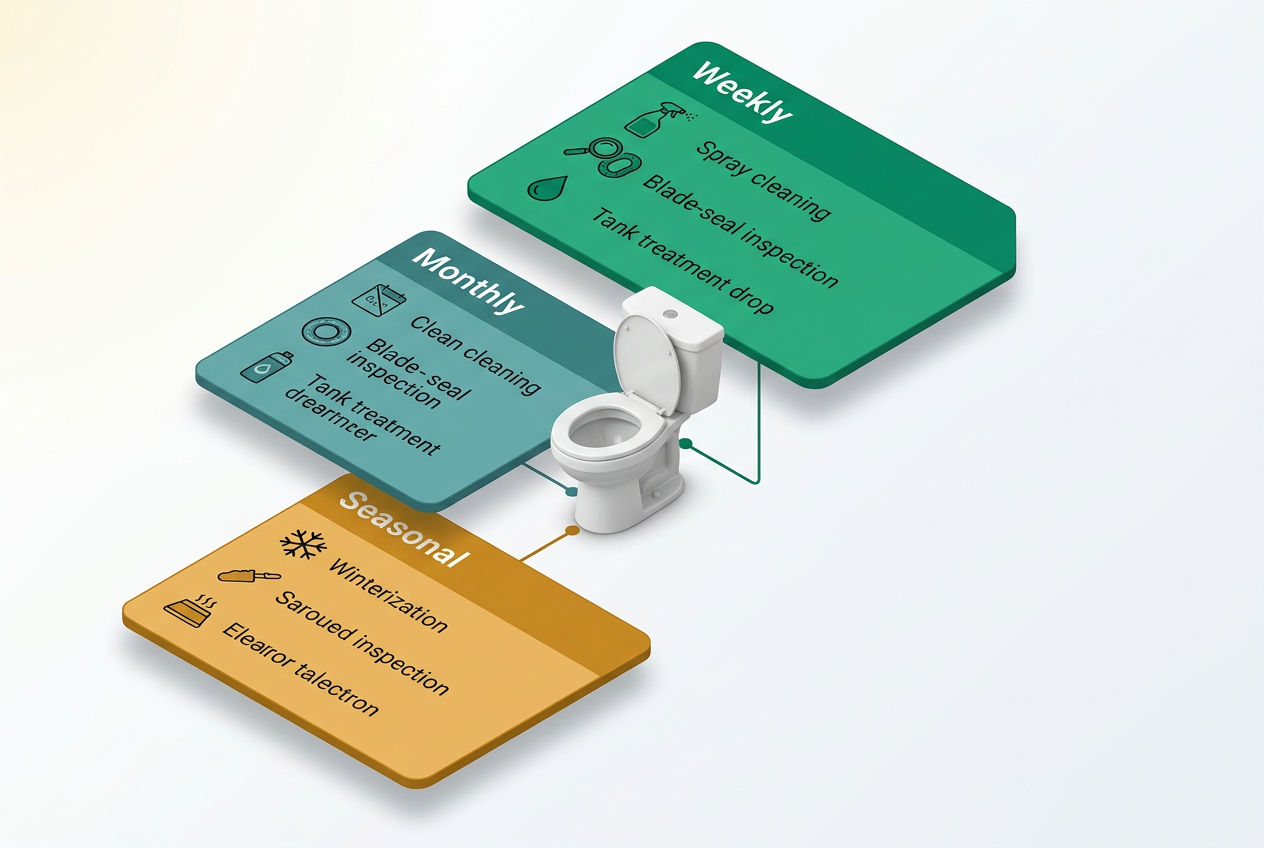
Get the Handbook — $27 →Instant download · 250+ pages, 17 chapters + printable toolkit · Yours to keep foreverRV toilet maintenance has three pillars: the seal, the tank chemicals, and winterization. Neglect any one of them and you're looking at odor problems, freeze damage, or a valve replacement.
Seal Maintenance
The rubber ball valve seal is the part most likely to cause you problems. It dries out from lack of use, cracks from harsh chemical cleaners, and eventually stops forming an airtight barrier against black tank gases.
Signs your seal is failing:
- Persistent sewer smell even when the toilet isn't in use
- Visible cracking or stiffness in the rubber when you look down the bowl with the valve open
- Water weeping past the valve when the bowl is filled
Fix: Apply a thin coat of petroleum-free RV toilet seal lubricant (Thetford sells a product specifically for this) every 3–6 months. When lubricant stops solving the smell problem, replace the seal — it's a $10–$30 part and a 20-minute job. See our rv toilet seal replacement guide for step-by-step instructions.
What not to use: Bleach, Lysol, and standard household bathroom cleaners will accelerate seal deterioration. The same chemicals that kill odor-causing bacteria also break down the rubber compounds in the seal. Stick to RV-specific enzyme cleaners.
Black Tank Chemical Treatment
After every dump, add a black tank treatment chemical before you start using the toilet again. These products do two things: suppress odor-causing bacterial activity and break down solid waste and toilet paper so sensors stay accurate and the tank empties cleanly.
Two chemical categories exist:
- Formaldehyde-based treatments — highly effective at odor control but banned in many state parks and illegal to dump in certain jurisdictions. Check local rules before using.
- Enzyme and bio-based treatments — slower-acting but legal everywhere and safer for septic systems if you ever connect at home. These are the better default.
See our rv black tank treatment guide for specific product recommendations and dosing instructions.
Winterization
Water left in an RV toilet's water line and valve will freeze and crack both the plastic housing and the rubber seal. According to the Recreational Vehicle Industry Association (RVIA), freeze damage to plumbing components — including toilet assemblies — is among the top five warranty claims filed after winter storage.
Winterization steps:
- Flush the toilet until the bowl is empty.
- Turn off the water supply to the toilet.
- Pour 1–2 cups of RV-specific antifreeze (propylene glycol-based, not automotive ethylene glycol) into the bowl and press the foot pedal briefly to coat the valve and seal.
- Leave a small amount of antifreeze sitting in the bowl bottom through storage.
Do not use automotive antifreeze — it is toxic and will damage the seal material.
Can You Use a Regular Toilet in an RV?
A standard residential toilet will not function in an RV as a direct replacement. Residential toilets require constant water pressure to the fill valve (an RV's water pump provides only intermittent pressure), use a siphon-trap design that needs a P-trap drain line (RVs don't have one), and are significantly heavier than RV-specific units.
That said, RV-specific toilets have steadily improved. Comfort-height models from Thetford and Dometic now match the bowl height and seat width of mid-range residential toilets. The difference in user experience is smaller than it was ten years ago.
The one exception: custom coach conversions where a qualified RV plumbing technician redesigns the entire waste system — adding a proper P-trap, a macerating pump, and a water pressure regulator — can support a residential-style toilet. This is uncommon, expensive (typically $1,500–$4,000 in labor), and only makes sense in large Class A motorhomes where space and budget allow. Stick with an RV-specific toilet unless you're doing a full custom build with a certified technician designing the plumbing from scratch.
Do RV Toilets Need a Septic System Connection?
No — most RV toilets route waste into an onboard black water holding tank, not into any fixed septic or sewer system. The tank gets emptied at a designated dump station, which connects to a municipal sewer or a commercial waste treatment facility.
RVers who park permanently or semi-permanently at a home property sometimes plumb their rig's black tank outlet directly into the property's home septic system. This eliminates dump station trips but requires specific conditions: adequate septic tank capacity for the additional load, a compliant connection point, and — in most states — a permit or inspection. Florida county health departments and Texas On-Site Sewage Facility Designated Representatives are examples of local authorities that regulate this type of connection.
For the specifics of that setup, see our dedicated guide on rv septic vs. house septic connections.
Can You Connect RV Waste to Your Home Septic System?
Yes, but it is not as simple as running a garden hose from your black tank outlet to a cleanout port. Done incorrectly, it can overload your septic system, violate local health codes, and create a backflow risk into your RV.
What a compliant connection requires:
-
Capacity headroom in your existing septic tank. A standard 1,000-gallon residential septic tank is sized for the home it serves. Adding an RV's daily waste load — 6–10 gallons per day for two adults — is manageable if the tank was originally sized conservatively, but may overwhelm a tank already operating near capacity. A septic professional can assess this with a load calculation before you connect anything.
-
A proper inlet connection. The connection must be made at the septic tank's inlet baffle, not at a distribution box or leach field cleanout. Bypassing the tank and going directly to the drain field is a common DIY mistake that introduces solids into the field and can cause irreversible failure.
-
A permit in most jurisdictions. Many states and counties classify adding an RV waste connection as a modification to a permitted system, requiring inspection and approval. Operating without the permit can void your septic system's compliance status and create liability issues if you sell the property.
-
Backflow prevention. A check valve on the connection line prevents septic gases and liquids from flowing back into the RV when tank pressure fluctuates.
If your system has capacity and you get the proper permits, the connection hardware itself is inexpensive — a 3" ABS or PVC tee fitting and a check valve run $30–$60 in materials. The permit and inspection cost varies widely: $75–$300 in most counties.
If you're not sure whether your septic system can handle the load, schedule a septic pumping and inspection before you add any new inputs. A professional can measure sludge and scum layers, assess the tank's current load, and give you a clear answer. For regional cost expectations, see our septic pumping cost guide.
For broader context on how residential septic systems work and why proper loading matters, see our guide to what a septic system is and our article on how often to pump a septic tank.
What Should You Know About RV Toilet Paper?
Use only toilet paper labeled "RV safe," "septic safe," or "rapid dissolving." Standard residential toilet paper — especially two-ply and three-ply varieties — does not break down fast enough in a black water tank and will clog the tank's outlet valve and sensors over time.
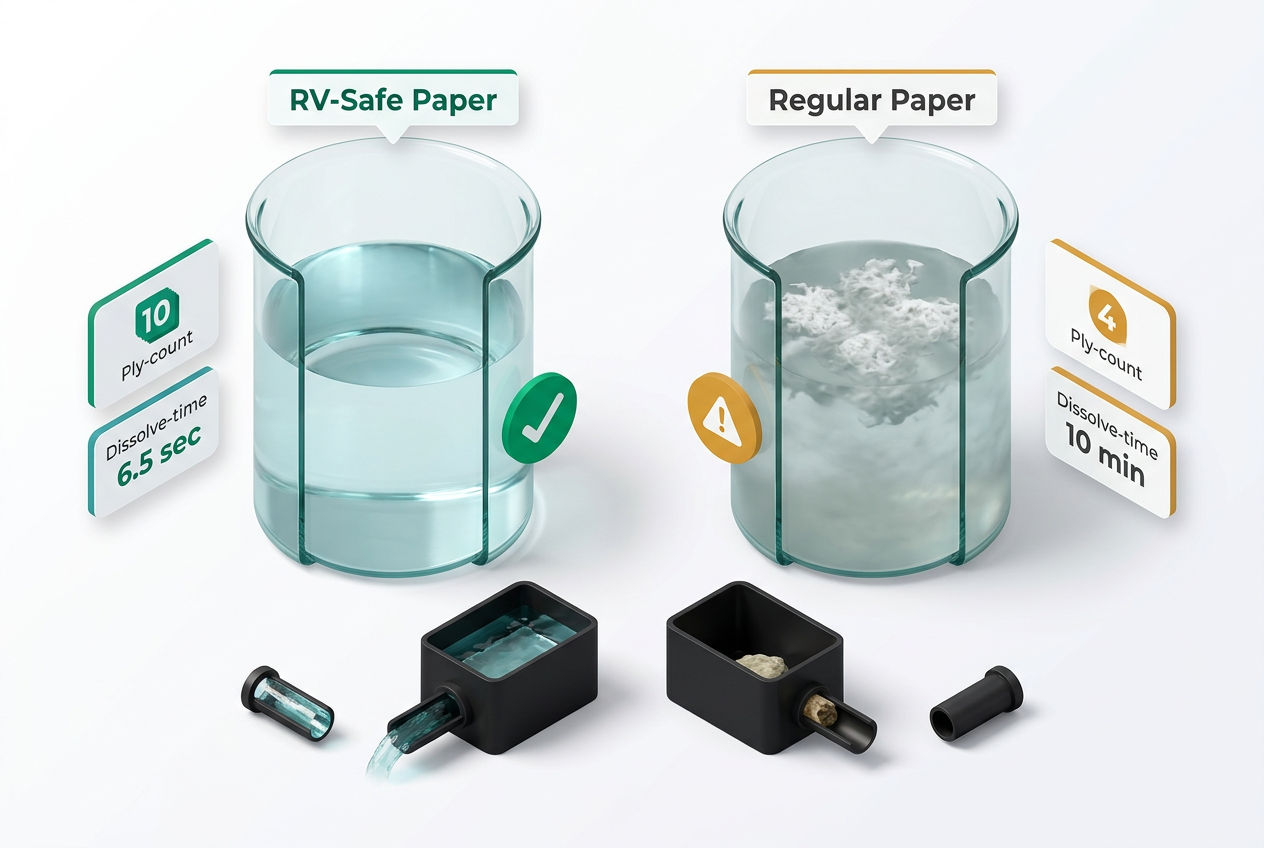
The practical test: drop a few sheets into a jar of water, shake it for 30 seconds, and look at how much it has dissolved. RV-safe paper will be largely disintegrated. Standard residential paper will still be largely intact.
Scott 1000 single-ply is the most commonly cited budget-friendly option that passes this test. Dedicated RV brands like Camco and Thetford sell pre-tested rapid-dissolving paper at a premium.
For a detailed comparison of tested brands and what to avoid, see our best rv toilet paper guide. Also note that the same rapid-dissolving standard applies if you ever connect your RV to a home septic system — standard toilet paper is one of the primary causes of early drain field failure, and the guidance in our septic-safe cleaning products guide applies equally to your RV waste stream.
Related Guides in This Series
- 'RV Sewer Hoses: How to Choose, Connect, Use & Store One'
- The Best RV & Septic-Safe Toilet Paper (Tested Picks)
- The Best RV Black Tank Treatments (and How to Use Them)
- How to Replace an RV Toilet Seal (Step by Step)
- 'How to Replace an RV Toilet: A DIY Guide'
- The Best RV Black Tank Cleaner (Top Picks)
- The Best Composting Toilet for RV (Top Picks)
- How to Empty an RV Black Tank (Without the Mess)
- 'RV Holding Tank: The Complete Guide'
- 'Dometic vs. Thetford RV Toilets: Which Should You Buy?'
Frequently Asked Questions
How do I know if my RV toilet seal is bad?
A failing RV toilet seal produces one unmistakable symptom: a persistent sewer smell inside the bathroom when the toilet isn't in use. The rubber seal sits at the base of the bowl and forms an airtight barrier between the bowl and the black water tank. When it cracks or dries out, tank gases migrate upward through the valve even when it's in the closed position. To confirm the seal is the culprit, pour a small amount of water into the bowl and watch whether it holds for several minutes or slowly seeps through. A good seal holds water; a failing one lets it drain past the valve. You may also see the seal visually — with the valve open, look at the rubber ring around the valve edge. Cracking, stiffness, or a white chalky residue indicates deterioration. Replacement seals cost $10–$30 and require no special tools.
Can you use Clorox wipes or bleach on an RV toilet?
No — bleach-based products, including Clorox wipes, Lysol spray, and standard bathroom disinfectants, will degrade your RV toilet's rubber seal and accelerate valve failure. The same chemical properties that make bleach effective at killing bacteria also break down the rubber compounds that keep the seal flexible and airtight. Once the seal dries out and cracks, you're looking at a $10–$30 part replacement at minimum, or a full valve assembly replacement if the damage extends further. For cleaning the bowl itself, use RV-specific enzyme-based cleaners or a mild dish soap solution. For disinfecting, look for products explicitly labeled "RV safe" or "septic safe" — these are formulated to kill surface bacteria without attacking the rubber components downstream. Nature's Head and Thetford both sell toilet-specific cleaners that are safe for bowl surfaces and tank chemistry.
What happens if you put regular toilet paper in an RV?
Regular toilet paper — especially two-ply and three-ply residential brands — does not break down quickly enough in an RV black water tank. The paper accumulates, clumps around the tank's outlet valve, and eventually causes two problems: clogged sensors that read incorrectly and a blocked outlet that requires manual clearing or chemical treatment. In severe cases, the clump hardens into what the RV community calls a "poop pyramid" — a solid mass that forms directly below the toilet valve when the tank sits static for long periods. Clearing a poop pyramid typically requires diluting the tank with water and agitating it, which can take 24–48 hours with enzyme treatments. Prevention is simple: use toilet paper labeled rapid-dissolving, RV safe, or septic safe. Scott 1000 single-ply is widely available and passes the jar-shake dissolution test without paying a premium for dedicated RV brands.
Is an RV toilet the same as a boat toilet?
They serve the same function but use different standards and are not interchangeable. Boat toilets — often called marine heads — are designed for saltwater environments, with stainless steel and marine-grade plastics rated for corrosion resistance. They typically connect to holding tanks rated under U.S. Coast Guard regulations (33 CFR Part 159), which govern overboard discharge in U.S. waters. RV toilets are built to RVIA standards for road vibration tolerance and fresh water system integration. The floor bolt patterns differ, the water supply connections differ (marine heads often use raw water intake, not a pressurized freshwater line), and the chemical treatments recommended for marine holding tanks differ from standard RV black tank products. A boat toilet can technically be installed in a van or RV in a custom build, but you'd be using a more expensive, overbuilt product with no practical benefit over an RV-specific unit.
How do you get rid of black tank odors that won't go away?
Persistent black tank odor that survives normal chemical treatment usually has one of three causes: a failing toilet seal, a fouled tank sensor probe, or a ventilation stack blockage. Start by ruling out the seal — pour water into the bowl and check whether it holds without draining past the valve. If the seal is intact, the smell is likely coming through the roof vent pipe rather than the toilet. A blocked or improperly sized vent stack creates negative pressure that pulls odors backward into the bathroom instead of venting them upward. Check the vent cap on the roof for debris blockage. The third possibility is sensor fouling — waste buildup coats the sensor probes and creates a persistent odor source inside the tank that chemical treatments can't reach. A targeted sensor cleaning with a product like Unique Sensor Cleaner, combined with a thorough tank rinse, usually resolves it. According to Thetford's technical support documentation, approximately 40% of odor complaints that persist after treatment are vent-related, not seal-related.
What is the smallest RV toilet available?
The smallest dedicated RV toilets on the market are cassette and portable units, which have a significantly smaller footprint than standard gravity flush models. The Thetford Porta Potti 335 measures roughly 15" × 13.4" × 12.4" and weighs under 8 pounds empty — small enough to fit in a truck cab or under a van bench seat. Among installed cassette toilets, the Thetford C-200 series has the most compact footprint in the fixed-installation category. For gravity flush toilets, the minimum floor space is roughly 14" × 15", which is the standard bolt pattern area plus the base. If you're working with extremely limited floor space — a converted cargo van or a small pop-up trailer — a cassette toilet is almost always the better fit than trying to shoehorn a gravity flush unit into a space that wasn't designed for it. Measure your available floor space and the door clearance before ordering any unit.
Sources & Methodology
- Thetford Corporation — product specifications, seal maintenance documentation, and dealer pricing for Aqua-Magic and Porta Potti product lines. Accessed May 2025.
- Dometic Group — product specifications and installation documentation for 310 Series and 320 Series RV toilets. Accessed May 2025.
- Recreational Vehicle Industry Association (RVIA) — RVIA 2023 market data on RV ownership, plumbing component warranty claims, and industry shipment statistics. According to RVIA, approximately 11.2 million U.S. households own an RV as of 2023, making RV sanitation maintenance a significant segment of the residential waste management market.
- U.S. Environmental Protection Agency (EPA) — guidelines on residential septic system capacity and loading rates, used to inform the RV-to-home-septic connection section. EPA document 625/R-00/008.
- Nature's Head LLC — product documentation and user capacity estimates for composting toilet liquid and solid waste compartments. Accessed May 2025.
Pricing ranges reflect manufacturer MSRP and major online retailer pricing as of Q1 2025. Labor cost estimates are based on published rates from RVIA-member service centers. Individual costs will vary by region and installer. We have not independently tested every product referenced in this article; recommendations are based on documented specifications, user-reported data, and manufacturer technical documentation.
Was this article helpful?
Frequently Asked Questions
Recommended Resources
📖 Related Articles
- The Best Composting Toilet for RV (Top Picks)
- Composting Toilets: The Complete Guide (How They Work + Best Models)
- Dometic vs. Thetford RV Toilets: Which Should You Buy?
- How to Replace an RV Toilet: A DIY Guide
- RV Holding Tank: The Complete Guide
- How to Replace an RV Toilet Seal (Step by Step)
- The Best RV Black Tank Treatments (and How to Use Them)
- RV Septic vs House Septic: Key Differences Explained
- What Is a Septic System? How It Works (Visual Guide)
- How Often Should You Pump Your Septic Tank?
- The Best RV & Septic-Safe Toilet Paper (Tested Picks)
- Septic-Safe Cleaning Products: The Complete List (Safe vs. Avoid)
💰 Cost Guides
🔧 Services
Find Septic Professionals Near You
Connect with licensed, verified septic companies in your area.