

Quick Answer
Meta Description: Learn how an RV holding tank works, how often to empty it, and how to treat, clean, and winterize your RV waste tank. Complete guide with size charts, step-by-step instructions, and FAQ.
An RV holding tank is a sealed onboard storage tank that holds waste water until you can empty it at an approved dump station. Most RVs carry three: a black water tank for toilet waste, a gray water tank for sink and shower drainage, and a fresh water tank for potable supply. Black tanks on travel trailers typically run 15–30 gallons; Class A motorhomes commonly hold 40–50 gallons. Empty when two-thirds full.
Key Takeaways
- RVs have two or three holding tanks: black water (toilet), gray water (sinks/shower), and fresh water
- Empty the black tank when it's two-thirds full — not before, not when it's overflowing
- A couple full-timing fills a black tank in 3–5 days; a family of four in 1–2 days
- Use an enzyme-based holding tank treatment after every dump to control odor and break down solids
- Winterize all tanks before temperatures consistently drop below 32°F to prevent cracked tanks and burst lines
What Are the Three Types of RV Holding Tanks?
RVs use three separate tanks — black, gray, and fresh water — and knowing which does what prevents the mistakes that strand you at a campground with a plumbing problem.
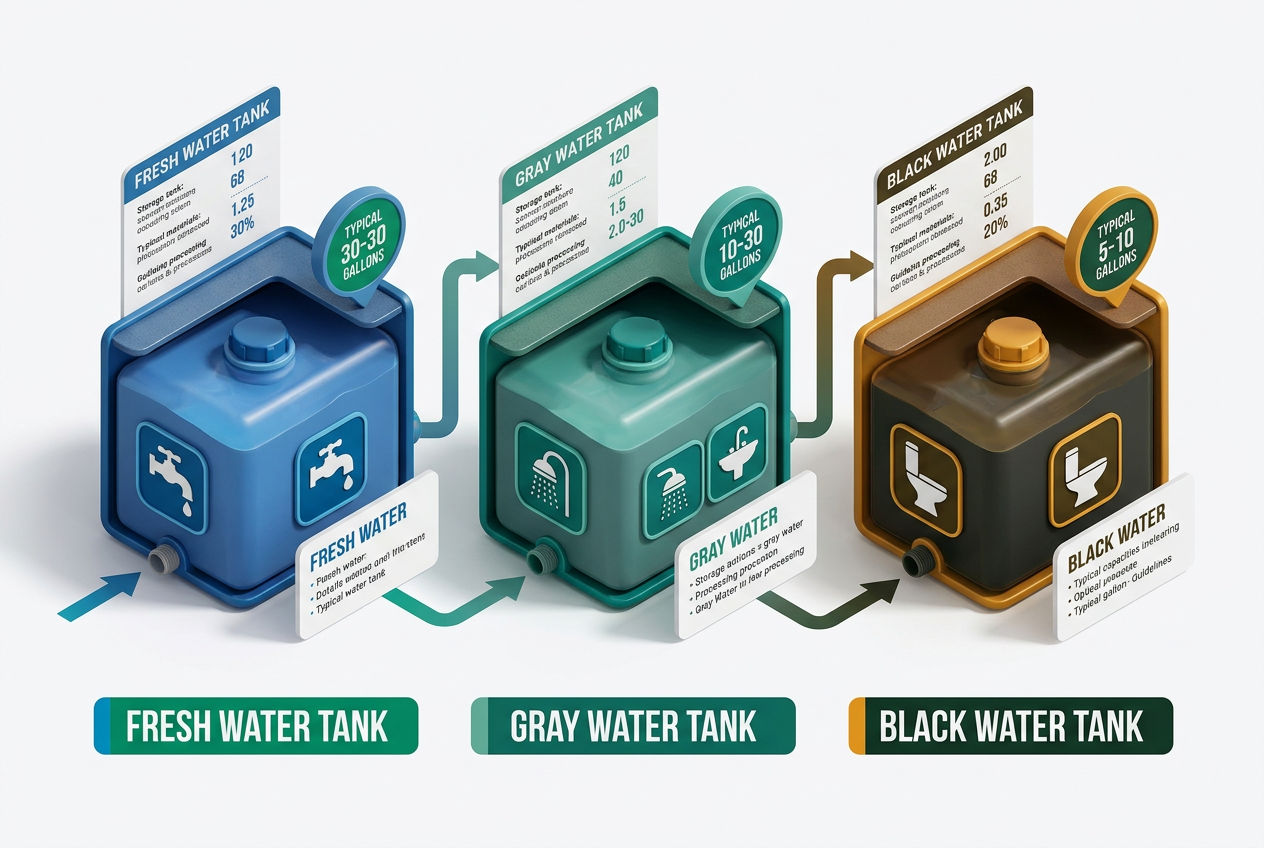
Black water tank. This is where everything from your RV toilet goes. Human waste, toilet paper, flush water. Black tanks on travel trailers and Class C motorhomes typically hold 15–30 gallons. Class A motorhomes commonly run 40–50 gallons. Never use regular household toilet paper in this tank — it doesn't break down fast enough. RV-specific toilet paper dissolves rapidly and keeps your tank healthier.
Gray water tank. This catches drainage from your sinks and shower. It's not clean water, but it doesn't contain sewage. Gray tanks are usually slightly larger than black tanks — typically 20–60 gallons — because showers and dishwashing generate more volume than most people expect. Gray water still contains bacteria, soap residue, and grease, so it can't be dumped just anywhere. California, Washington, and Oregon enforce strict rules about gray water disposal; roadside dumping can result in fines.
Fresh water tank. This stores your potable water supply and typically holds 20–100 gallons depending on RV class. It feeds your faucets, shower, and toilet fill. It's separate from both waste tanks and doesn't connect to the sanitation system except as a water source.
That three-tank system works similarly to a residential septic setup, except your home's system processes waste in place using soil and bacteria — your RV stores it until you can move it somewhere else.
How Does an RV Holding Tank Actually Work?
Waste from the toilet flows by gravity into the black tank below. A slide valve — called the black tank dump valve — stays closed while you're camping. When you're ready to empty, you connect a sewer hose to the tank's 3-inch bayonet fitting and open the valve at a dump station or full-hookup campsite.
Timing matters more than most new owners realize. A common mistake is opening the dump valve too early. If there's not enough liquid in the tank, solids pyramid up around the valve and dry into a concrete-like clog. Wait until the tank is at least two-thirds full. The liquid bulk carries the solids out cleanly.
Gray tanks get emptied the same way, through a separate valve and fitting. Always dump the black tank first, then open the gray valve — the cleaner gray water rinses the sewer hose as a final flush.
What Size RV Holding Tank Do You Need? A Guide by RV Class
| RV Type | Black Tank | Gray Tank | Fresh Water |
|---|---|---|---|
| Class A Motorhome | 40–50 gal | 50–60 gal | 75–100 gal |
| Class B Van Camper | 10–15 gal | 15–20 gal | 20–30 gal |
| Class C Motorhome | 30–40 gal | 35–50 gal | 40–60 gal |
| Fifth Wheel | 35–50 gal | 40–60 gal | 50–80 gal |
| Travel Trailer | 15–30 gal | 20–40 gal | 20–50 gal |
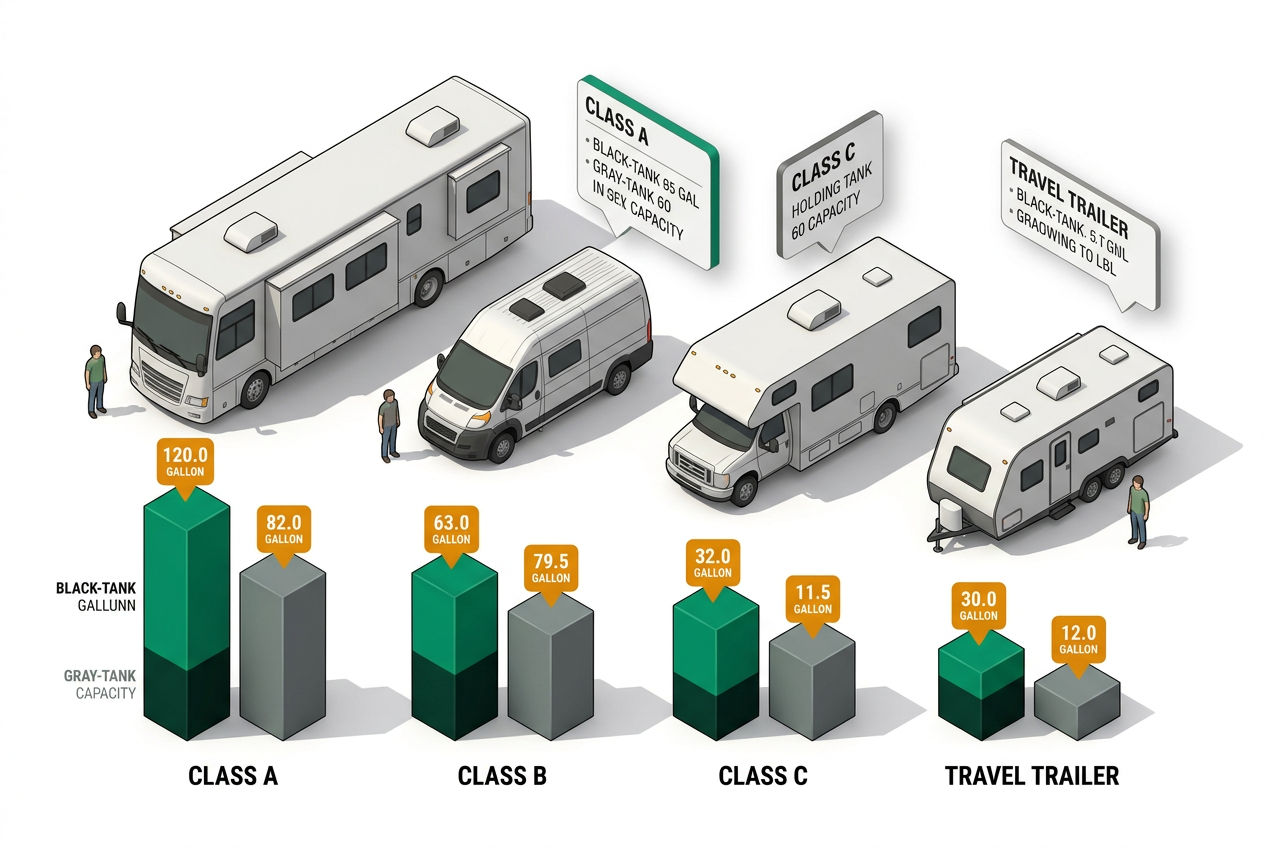
Source: Industry averages based on manufacturer specs from Forest River, Keystone, and Winnebago model data.
Worked example: Say you own a 32-foot Class C motorhome with a 35-gallon black tank. At two-thirds capacity, you're targeting a dump at roughly 23 gallons. A couple using the RV toilet exclusively — approximately 8–10 flushes per day at 1.6 gallons per flush — generates about 13–16 gallons of toilet waste daily. That means your dump window opens around day 1.5 to 2. Add campground bathroom use during the day and you might push that to day 3 comfortably. This math helps you plan dump station stops before the tank forces the issue.
How Often Should You Empty an RV Holding Tank?
The two-thirds rule is your guide: empty your RV holding tank when it's about two-thirds full. At two-thirds capacity, you have enough liquid to flush solids through the valve cleanly. Go too early and you risk a pyramid clog. Go too late and you're flirting with overflow.
How long that takes depends entirely on your household size and habits. A couple full-timing in an RV will typically fill a 30-gallon black tank in about 3–5 days. A family of four might hit two-thirds capacity in 1–2 days on a 30-gallon tank. Using a campground's bathroom during the day stretches that timeline considerably.
Gray tanks fill faster. Showers, dishwashing, and handwashing can fill a 40-gallon gray tank in 2–3 days for a couple. If you're boondocking — camping without hookups on Bureau of Land Management land or dispersed Forest Service sites — your tank capacity becomes critical. You're self-contained until you can reach a dump station. Many experienced boondockers plan dump runs every 5–7 days and cut water use accordingly.
What Is the Difference Between a Black Tank and a Gray Tank?
The black tank holds toilet waste and contains pathogens including E. coli and coliform bacteria. It requires treated handling and must be dumped at an approved dump station or sanitary sewer connection. The gray tank holds sink and shower drainage — no toilet waste — but it still contains bacteria, soap, and food particles. Both tanks require proper disposal. Neither can be legally dumped on the ground in most states.
The key operational difference: you dump the black tank before the gray tank, and you treat the black tank with enzyme or chemical additives to manage odor and break down solids. Gray tanks need less treatment but still benefit from occasional cleaning to prevent grease buildup and odors.
Some RVers also call these tanks by the names RV sewage tank (black) and RV wastewater tank (gray). The terminology varies by region and manufacturer, but the function is the same.
How Do You Use RV Holding Tank Treatment Chemicals?
After every dump, add a black tank treatment before you use the toilet again. The two most common types are:
Enzyme-based treatments (such as Happy Campers or Unique RV Digest-It) use beneficial bacteria and enzymes to break down waste naturally. They're septic-safe and biodegradable. Per product label, most require 2–4 oz per dose mixed with at least 1–2 gallons of water poured into the toilet.
Chemical treatments (formaldehyde-based or zinc-based deodorizers) kill bacteria and mask odor fast. They work well but are not septic-safe — meaning you can't legally dump into a residential septic system with these treatments active.
Temperature matters. According to the University of Arkansas Cooperative Extension, enzyme treatments need warm conditions to activate properly — most work best above 45°F. In cold camping conditions, chemical treatments may outperform enzymes because bacteria go dormant below freezing.
Always add at least 1–2 gallons of water to the black tank before first use. A dry tank causes solids to stick immediately. For those wondering whether RV holding tank chemicals affect a home septic system — enzyme-based treatments are generally septic-safe. Formaldehyde-based chemicals kill the beneficial bacteria your septic system needs to function. Check the label before dumping into a residential septic connection.
Limitation to know: No RV holding tank treatment fully eliminates odor in extreme heat above 90°F or when tanks sit longer than 7 days without ventilation. If you're camping in the Sonoran Desert in July, even the best enzyme products will struggle. In those conditions, daily ventilation and shorter dump intervals matter more than product choice.
How Do You Empty an RV Holding Tank Step by Step?
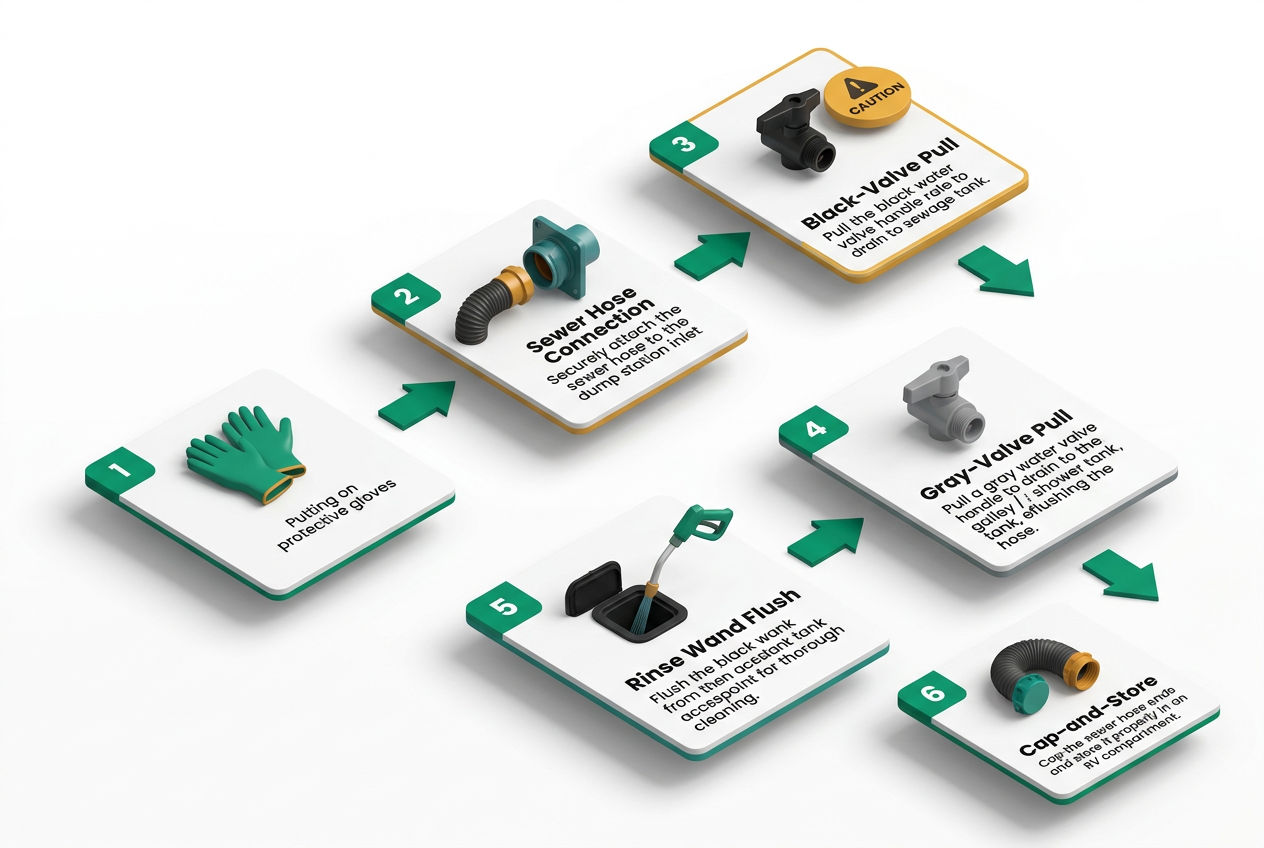
Emptying your tanks correctly takes about 10 minutes. Here's the process:
-
Pull up to the dump station inlet. Most dump stations have a 4-inch concrete or PVC opening at ground level with a lid. They're found at campgrounds, truck stops, RV dealers, and dedicated dump stations. According to Sanidumps.com, there are over 8,000 dump stations across the US. Expect to pay $0–$25 per use; many campgrounds include it free with your site fee.
-
Connect your sewer hose. Gloves on first — always. Connect one end to your RV's dump fitting (3-inch bayonet connection) and the other end into the dump station inlet. A clear elbow connector between the hose and inlet lets you see when the tank is empty.
-
Open the black tank valve first. Pull it fully open and let the tank drain completely. Watch through the clear elbow — when the flow changes from dark to clear, the tank is empty.
-
Close the black tank valve. Never leave it open while connected at a full-hookup site. An open valve lets liquid drain constantly while solids accumulate — the exact condition that creates pyramid clogs.
-
Open the gray tank valve. Gray water flushes the sewer hose as a final rinse. Let it drain completely, then close.
-
Rinse your sewer hose. Most dump stations have a rinse hose. Flush your sewer hose before packing it. Store it in a dedicated compartment, never near food or fresh water equipment.
-
Add treatment immediately. Pour your enzyme or chemical treatment into the toilet with 1–2 gallons of water before you pull away. Starting with a treated, wet tank prevents the first deposit from sticking to dry plastic.
For more detail on this process, see how to empty an RV black tank.
What Happens If You Don't Empty Your RV Holding Tank?
Three things go wrong when you ignore dump timing on an RV waste tank.
Pyramid clog. This is the most common and most preventable failure. When you dump too early or leave the valve open at a hookup site, solids pile up around the open valve and dry out. The result is a concrete-like obstruction that resists standard flush attempts. Fixing it requires filling the tank completely with water and tank treatment and letting it soak 24–48 hours. Severe cases require a tank wand or professional service.
Sensor failure. RV holding tank sensors use probes that extend into the tank interior. Dried waste, toilet paper, and mineral deposits coat these probes and give false readings — most commonly a perpetual "full" reading regardless of actual level. The GEO Method (below) addresses this.
Overflow. An overfull RV sewage tank backs up into the toilet bowl and, in worst cases, can compromise seals and generate dangerous hydrogen sulfide gas. At that point you've got a health hazard, not just an inconvenience.
Staying current on dumps is the single cheapest maintenance habit you can maintain.
How Do You Fix Common RV Holding Tank Problems?
Pyramid clog: Fill the tank completely with hot water and 2–4 oz of enzyme treatment. Let it soak 12–48 hours. Drain. Repeat if needed. If two full cycles don't clear it, a flexible tank wand ($20–$40) inserted through the toilet can break it up mechanically.
Paper clog: Switch to RV-specific toilet paper immediately. For the existing clog, the same soak-and-drain process applies. Regular household paper, paper towels, and wet wipes are the primary cause. Never put wet wipes in an RV toilet regardless of what the label says.
Persistent odor after dumping: Check the RV toilet seal first. A cracked or dried seal lets tank gases back into the cabin. If the seal is intact, the odor source is likely inside the tank — add a double dose of enzyme treatment and increase ventilation. Some odor in summer heat is unavoidable; see the limitation note in the treatment section above.
False sensor readings: Use the GEO Method. Add 1 cup of water softener (such as Calgon) and 1 cup of liquid laundry detergent to the black tank with 1–2 gallons of water. Drive the RV to slosh the mixture across the probe sensors. Drain and refill once. For persistent fouling, Unique Sensor Cleaner is formulated specifically for probe cleaning. If sensors still read incorrectly after two cleaning cycles, probe replacement ($50–$150 per sensor) is more cost-effective than repeated cleaning attempts.
How Do You Deep Clean an RV Holding Tank?

The Septic Owner's Handbook
Own a septic system? Get the manual nobody gave you.
How it works, the golden rules, the maintenance calendar, and a warning-signs decoder for every gurgle, smell, and wet spot — so small issues never become $15,000 ones.
Get the Handbook — $27 →Instant download · 250+ pages, 17 chapters + printable toolkit · Yours to keep foreverQuarterly deep cleaning prevents the buildup that causes persistent odors and inaccurate sensor readings. Here's a complete cleaning sequence:
Tank flush wand method. A Camco Flexible Tank Wand or similar product attaches to a garden hose and inserts through the toilet. The high-pressure spray breaks up wall deposits and rinses them toward the dump valve. Run it for 5–10 minutes with the dump valve closed, then open the valve and let it drain.
Recirculating flush. Some RVs have a built-in black tank flush port — a separate water inlet that sprays the tank interior. If yours has this, connect a hose to the flush port, close the dump valve, and run water for 10 minutes. Open the dump valve and let it drain while water continues running. This is the most effective method for tanks that have this feature.
GEO Method for sensors. Add 1 cup of Calgon water softener and 1 cup of liquid laundry detergent (original blue Dawn or generic equivalent) to a tank with 1–2 gallons of water. Drive the RV — even a short trip to the dump station. The motion sloshes the mixture across sensor probes and tank walls. Drain completely at the dump station.
Ice method for stubborn deposits. Some full-timers swear by dumping 5–10 pounds of ice into the black tank before a drive. The ice tumbles against the tank walls as you drive, physically scrubbing deposits loose. Evidence is anecdotal, but it's inexpensive and harmless.
After any deep clean, add a double dose of treatment before resuming use.
How Do You Winterize an RV Holding Tank?
Winterize before temperatures consistently drop below 32°F. Water expands when it freezes — a full tank in a hard freeze can crack the tank body or burst the inlet and outlet fittings. Replacement costs run $400–$1,200 for a Class A black tank, $150–$400 for travel trailer tanks. That makes a $10 jug of antifreeze a very reasonable investment.
Step-by-step winterization:
-
Dump and flush all tanks completely. Empty black and gray tanks at a dump station. Rinse with fresh water.
-
Drain the fresh water tank. Open all faucets until the tank and lines are empty. Open the low-point drain valves if your RV has them.
-
Bypass the water heater. Most RVs have a bypass valve on the water heater. Switch it to bypass — you don't want to fill a 6–10 gallon water heater with antifreeze.
-
Add RV antifreeze to the system. Use non-toxic RV/marine antifreeze (pink, propylene glycol-based — never automotive antifreeze). Pour 1–2 cups directly into each tank drain. Use a hand pump or the RV's water pump to pull antifreeze through the lines to each faucet.
-
Run each faucet until pink. Hot and cold at every faucet, including the outdoor shower if you have one. Run the toilet flush until pink.
-
Pour antifreeze into drain traps. Sink, shower, and toilet traps hold standing water. Pour a cup of antifreeze into each drain to protect the P-traps.
-
Leave valves closed. Keep dump valves closed throughout winter storage. Open valves let cold air travel directly into the tank, which can freeze residual moisture around fittings.
In Montana and Minnesota, where overnight temperatures can hit -20°F, consider adding Tank Techs RX antifreeze treatment to the black tank even after emptying. Facon Tank Heater Pads are an aftermarket solution for full-timers who winter camp in extreme cold — they attach to the tank exterior and draw 12V power to keep tank contents above freezing.
What Are Alternative RV Sanitation Options?
Not every RVer uses the standard three-tank configuration. According to the RVIA, many manufacturers now offer alternative sanitation systems as factory options.
Composting toilets. A composting toilet eliminates the black tank entirely. Solid waste composted in a chamber with coconut coir or peat moss. Liquid waste diverts to a separate bottle or tank. Nature's Head and Air Head are the two most common models in the RV market. They run $900–$1,100 installed and require no water to operate — a significant advantage for boondockers trying to extend their fresh water supply.
Cassette toilets. Common in Class B vans and European-style RVs. A removable waste cassette (typically 4–5 gallons) pulls out from an external access door and carries directly to any toilet or dump station for emptying. The Thetford C-200 and C-224 are the dominant models. Cassette systems eliminate the need for a sewer hose and work anywhere a regular toilet is accessible.
Portable waste tanks. When you're parked at a full-hookup site but your RV's dump fitting doesn't reach the sewer inlet, a portable tote tank solves the problem. The Barker 4-Wheeler and Thetford SmartTote2 are the most common options. They hold 25–32 gallons and roll to the dump station separately. At full capacity, a 32-gallon tote weighs approximately 265 pounds — empty it before it reaches that point.
For a deeper comparison of how an RV composting toilet stacks up against a standard black tank, see our full guide.
How Do RV Holding Tank Sensors Work, and Why Do They Fail?
RV holding tank sensors use a series of electrical probes mounted at different heights on the tank wall — typically at one-quarter, one-half, three-quarters, and full capacity. When waste water contacts a probe, it completes a circuit and lights the corresponding indicator on your monitor panel.
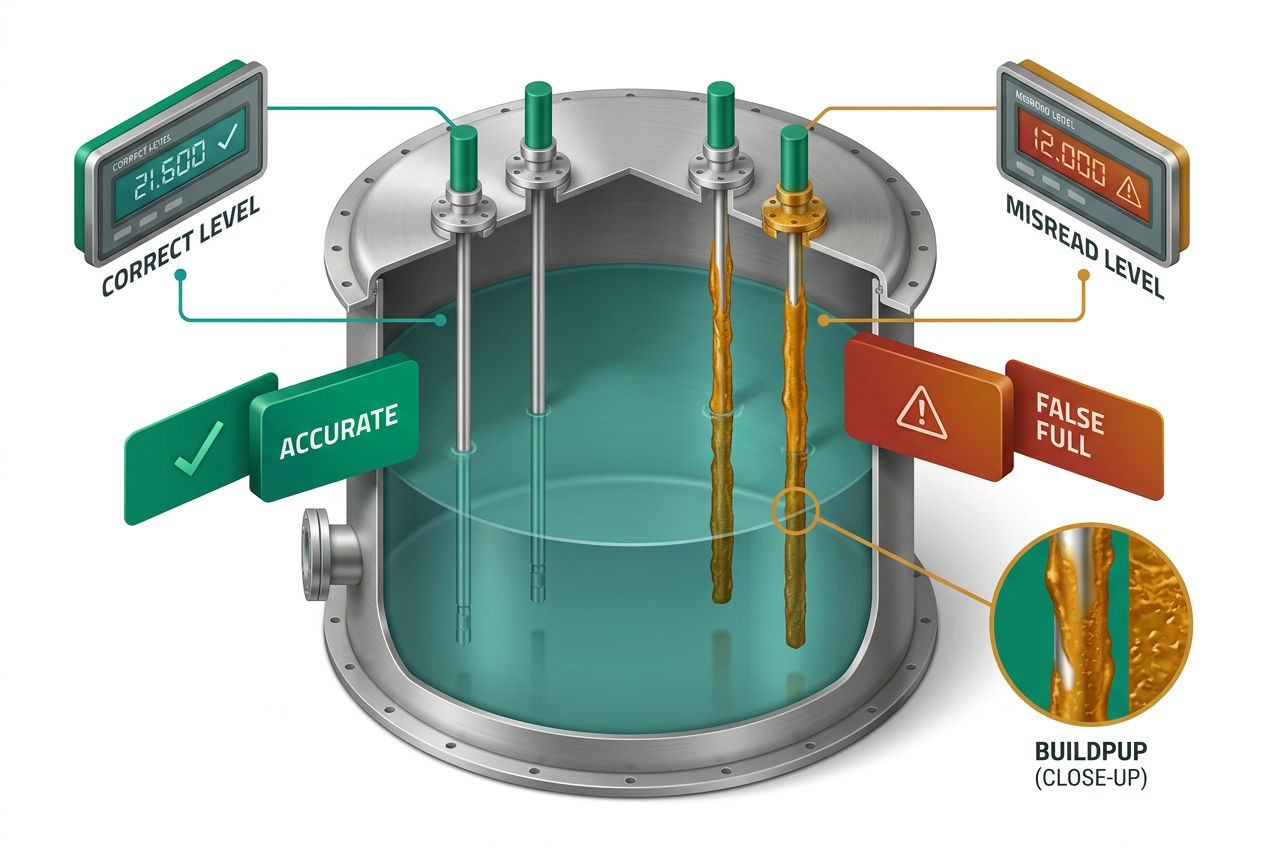
The failure mode is straightforward: toilet paper, waste solids, soap scum, and mineral deposits coat the probes over time. A coated probe reads as permanently wet — which is why the overwhelming experience among RV owners is a sensor that shows "full" even on a freshly dumped tank. This isn't a sensor malfunction exactly; it's contamination.
The diagnostic is simple. After dumping and adding 1 gallon of fresh water, check your panel. If sensors read anything above empty, they're fouled. The GEO Method described in the cleaning section above is the first-line fix. Unique Sensor Cleaner is the second. Probe replacement is the last resort at $50–$150 per sensor, but it works permanently in a way that cleaning doesn't.
Some newer RV models use external ultrasonic sensors that read through the tank wall rather than contact probes — these don't foul. If accurate tank monitoring matters to you and you're purchasing a new unit, ask the dealer specifically about the sensor type.
Seasonal and Regional Considerations for Your RV Waste Tank
Summer heat. Above 90°F, bacterial activity in the black tank accelerates dramatically. Enzyme treatments work faster but also generate more gas. Odor increases even with proper treatment. In the Sonoran Desert or Central Valley of California in July, expect to dump more frequently — every 3–4 days instead of 5–7 — and prioritize tank ventilation. Some owners add a second enzyme dose mid-cycle during extreme heat.
Winter cold. Below 32°F, enzyme bacteria go dormant and chemical treatments become your primary odor control. The bigger risk is freezing. Underbelly-insulated RVs (common on four-season models from brands like Arctic Fox and Northern Lite) protect tanks down to -25°F. Uninsulated travel trailers can freeze at 20°F if left static overnight without heat tape or tank heaters.
High altitude. Above 7,000 feet in the Mountain West — Colorado, Utah, Wyoming — reduced oxygen availability slows bacterial breakdown in enzyme treatments. Plan on slightly longer treatment soak times and consider increasing dose by 25–50% per product label guidance.
Regional dump station access. In the rural Mountain West and Great Plains, dump stations can be 50–100 miles apart. The Sanidumps.com database is the most reliable resource for locating stations along a planned route. In the Northeast, campground-based stations are more common but seasonal — many close October through April.
If you use a residential property's septic system for dumping, see our RV vs. house septic comparison for what's permitted and what can damage a home system.
Frequently Asked Questions About RV Holding Tanks
What is an RV waste tank and how is it different from a residential septic tank?
An RV waste tank — also called an RV sewage tank or RV black water tank — is a sealed polyethylene storage tank mounted under your RV that holds toilet waste until you empty it at a dump station. A residential septic tank is an underground concrete or fiberglass chamber that receives waste continuously and processes it through bacterial digestion and soil absorption over weeks. The critical difference is processing versus storage: your septic tank treats waste in place; your RV holding tank just holds it. Capacity is another gap — a typical residential septic tank holds 1,000 to 1,500 gallons, while even a large Class A RV black tank tops out at 50 gallons. That's why RV dump frequency (every 3–7 days) is so much higher than residential septic pumping frequency (every 3–5 years). See our 1,000-gallon septic tank guide for a full comparison of residential system sizing.
How do RV holding tank chemicals work, and are they safe for home septic systems?
RV holding tank chemicals work in one of two ways. Enzyme-based treatments — products like Happy Campers and Unique RV Digest-It — introduce live bacteria and digestive enzymes that break down waste solids and consume the gases that cause odor. Chemical treatments, typically formaldehyde-based or zinc-based, kill all bacteria and chemically neutralize odor compounds. For septic safety, the answer depends entirely on which type you use. Enzyme-based treatments are septic-safe and can actually benefit a home septic system by adding bacterial activity. Formaldehyde-based treatments are not septic-safe — they kill the beneficial bacteria a residential septic system depends on to function, potentially causing a system failure that requires professional septic repair at significant cost. Always check the label before dumping into a residential connection. If the label says "not for use with septic systems," route your dump to a dedicated RV dump station instead.
What size RV holding tank do I need for full-time living in an RV?
For full-time RV living, a black tank under 30 gallons creates real scheduling pressure — a couple will hit the two-thirds dump threshold in roughly two days. A comfortable full-timing setup starts at 35–40 gallons for a couple, which gives you a 3–5 day dump window without being obsessive about campground bathroom use. For a family of four, aim for 40–50 gallons minimum, or plan on dump stops every 1–2 days regardless. Gray tank sizing matters equally — full-timers generate more gray water than vacationers because every meal, every shower, every sink use adds up daily. A 40-gallon gray tank with a family of four fills in roughly 48 hours. If you're evaluating a used RV for full-time use, the Forest River Cherokee and Keystone Montana fifth wheels both offer factory configurations above 40 gallons on both tanks. Consider tank size before slide count when evaluating full-timing rigs — you can live without a slide; you can't ignore a small tank. For professional sizing help, contact our septic pumping and cleaning team.
Why does my RV black water tank smell even after dumping?
An RV black tank that smells after a fresh dump has one of four causes. First, check the toilet seal — a cracked or dried-out flapper seal on your RV toilet lets tank gases back into the cabin continuously. Press the foot pedal and watch the seal; if it doesn't seat completely or shows cracks, replace it. See our RV toilet seal replacement guide for step-by-step instructions. Second, check whether you added treatment and water immediately after dumping — a dry, untreated tank generates odor fast, especially in heat. Third, verify your tank vent pipe is clear. The vent pipe exits through the roof; a wasp nest or debris blockage traps gases inside. A visual inspection from the roof confirms this quickly. Fourth, if the odor comes on suddenly during warm weather with a properly maintained tank, the treatment may simply be underperforming in the heat. Enzyme treatments struggle above 90°F. In summer conditions, increase dump frequency and add a second dose mid-cycle. No treatment eliminates odor completely in sustained heat above 90°F — that's a chemistry limitation, not a product failure.
Can I use a portable RV waste tank instead of a built-in holding tank?
A portable RV waste tank — sometimes called a tote tank or honey wagon — is a rolling container that connects to your RV's dump outlet and carries waste to a dump station independently. Products like the Barker 4-Wheeler (32-gallon) and Thetford SmartTote2 (27-gallon) are the most common options, running $80–$180. They solve a specific problem: when you're parked at a full-hookup site but your RV's sewer outlet won't reach the ground connection. They're not a permanent substitute for a built-in black tank because of weight — a 32-gallon tote at capacity weighs approximately 265 pounds, which requires a level surface and a clear path to the dump station. Maneuvering 265 pounds on uneven campground terrain is genuinely difficult. Portable tanks work well as overflow capacity or for awkward site configurations. For full-time use or extended boondocking, a properly sized built-in RV holding tank is the practical choice. Portable tanks also require the same approved dump station disposal as built-in systems — they don't grant any additional disposal flexibility.
How do I know when my RV holding tank sensor is reading wrong versus accurately?
The simplest diagnostic: dump your black tank completely, then add exactly one gallon of fresh water through the toilet. Check your monitor panel. A working sensor should read empty or nearly empty. If it reads one-quarter, one-half, or full with one gallon inside, the probes are fouled — coated with waste residue, paper, or mineral deposits that complete the circuit even when the tank is empty. This is the standard failure mode and affects the majority of RVs after a season or two of use. Fix it with the GEO Method: add one cup of Calgon water softener and one cup of liquid laundry detergent with two gallons of water, drive the RV to slosh the mixture, then dump. For persistent fouling, Unique Sensor Cleaner is specifically formulated for probe cleaning and works well on mineral-heavy deposits. Run two cleaning cycles before concluding the probes need replacement. If sensors still read incorrectly after two cycles, probe replacement at $50–$150 per sensor is more cost-effective than ongoing cleaning. Newer ultrasonic sensor systems read through the tank wall without contact probes and don't have this fouling problem — worth requesting on a new RV purchase.
Sources & Methodology
- Sanidumps.com — Dump station count and geographic distribution data. sanidumps.com
- Recreation Vehicle Industry Association (RVIA) — Waste system design standards, septic compatibility guidance, and alternative sanitation system data. rvia.org
- U.S. Environmental Protection Agency — Gray water pathogen classification and disposal regulations. epa.gov
- University of Arkansas Cooperative Extension — Enzyme vs. chemical treatment effectiveness by temperature, bacterial activity thresholds.
- Forest River, Keystone, Winnebago manufacturer specifications — Tank capacity data by model class used in the size chart above.
Was this article helpful?
Frequently Asked Questions
Recommended Resources
📖 Related Articles
- The Best RV & Septic-Safe Toilet Paper (Tested Picks)
- What Is a Septic System? How It Works (Visual Guide)
- RV Sewer Hoses: How to Choose, Connect, Use & Store One
- The Best RV Black Tank Treatments (and How to Use Them)
- Septic-Safe Cleaning Products: The Complete List (Safe vs. Avoid)
- How to Empty an RV Black Tank (Without the Mess)
- How to Replace an RV Toilet Seal (Step by Step)
- Composting Toilets: The Complete Guide (How They Work + Best Models)
- The Best Composting Toilet for RV (Top Picks)
- RV Septic vs House Septic: Key Differences Explained
- 1000-Gallon Septic Tank: Dimensions, Cost & Concrete vs Plastic
🔧 Services
Find Septic Professionals Near You
Connect with licensed, verified septic companies in your area.