

Quick Answer
An RV toilet seal replacement takes 30–60 minutes for a first-timer, requires 4–6 basic tools, and costs $8–$35 in parts. The seal — sometimes called an rv toilet gasket or flange seal — sits between the base of your toilet and the black tank flange. When it fails, you'll smell it before you see the damage.
Key Takeaways
- RV toilet seals last 3–5 years under normal use; full-timers may need replacement every 1–2 years
- Seal kits cost $8–$35 depending on brand; Dometic and Thetford seals are not interchangeable
- Always empty and flush the black tank completely before starting — 100% empty, not mostly empty
- Freeze-thaw cycles are the #1 cause of premature seal failure in northern and mountain-region RVs
- If DIY isn't your thing, professional RV technicians charge $100–$200 for this repair
How Do I Know If My RV Toilet Seal Needs to Be Replaced?
The most reliable signs of a failing RV toilet seal are water collecting around the base of the toilet, a persistent sewage odor even after flushing, and a toilet that won't hold water in the bowl. You might also notice your rv holding tank odor getting worse over time — that's sewer gas escaping through a seal that's no longer doing its job.
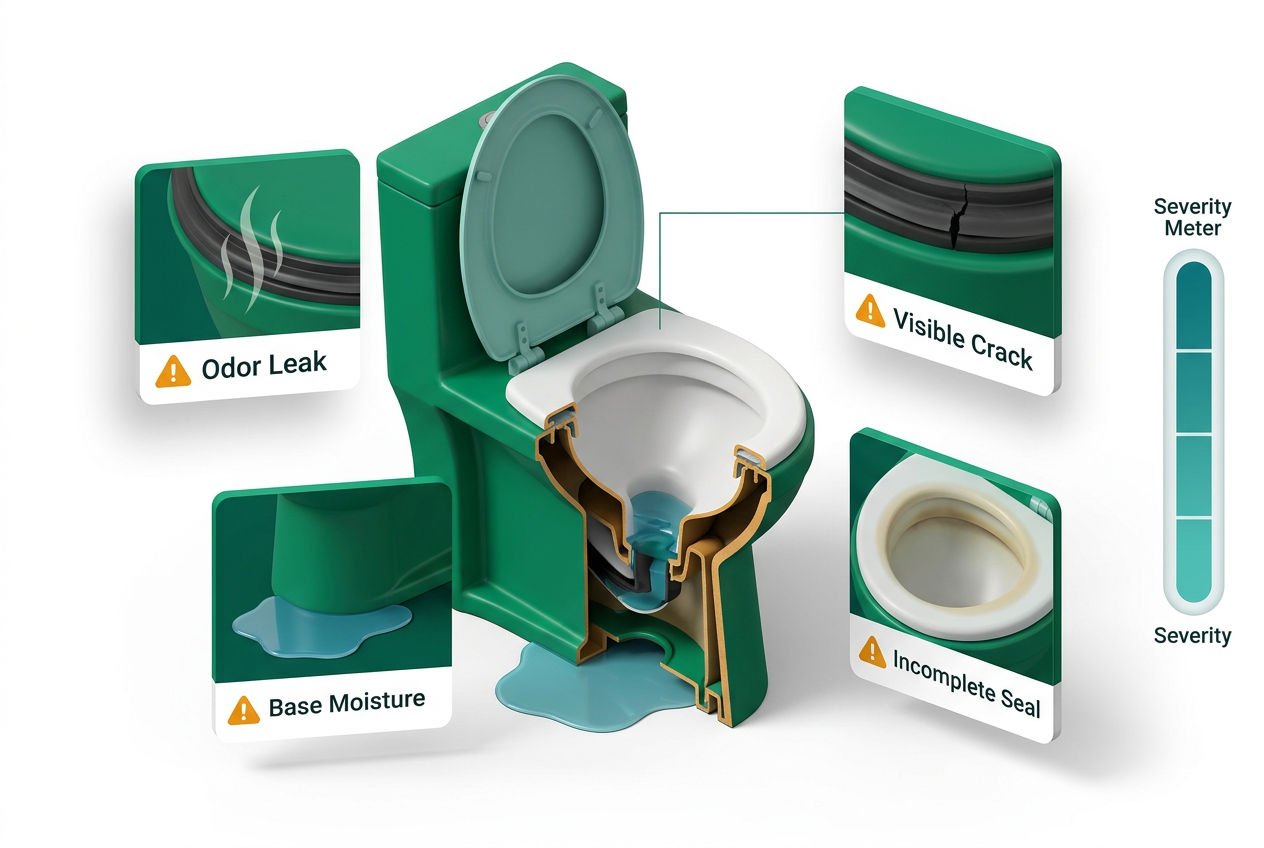
Here's what to watch for:
- Water at the base: After flushing, a thin ring of water appears around the toilet foot ring. This is a direct sign the seal has compressed or cracked.
- Black water smell: A sulfur or sewage odor that lingers inside the RV — especially when you open the toilet lid — signals gas is bypassing the seal. This is the rv toilet black water smell most RVers describe as "that smell you can't ignore."
- RV toilet running water: If water trickles into the bowl constantly, the water valve seal (a separate but related component) may also be compromised.
- Visible cracks or brittleness: If you can see the seal from the base of the toilet, look for cracking, flattening, or dark discoloration — all signs the rubber has deteriorated.
Seal lifespan: Under normal seasonal use, RV toilet seals last 3–5 years. Full-time RVers who use the toilet daily may see failure at 1–2 years. If you're in Arizona, Florida, or Texas and park your RV in direct sun, UV degradation and heat accelerate rubber breakdown — plan to inspect annually rather than every few years.
Can I Use a Regular Wax Ring on an RV Toilet?
No. A standard residential wax ring is not compatible with an RV toilet. Residential wax rings are designed for a rigid floor-mounted flange in a fixed structure. RV toilets mount to a lightweight floor with a rubber gasket-style seal — not wax — because RVs flex, vibrate, and are constantly in motion. A wax ring would crack, shift, and fail quickly under road conditions, and it won't create a proper seal against the ABS or plastic flanges common in RV bathrooms. Stick with a purpose-built rv toilet seal kit matched to your toilet brand and model number.
What's the Difference Between a Dometic and Thetford RV Toilet Seal?
Dometic and Thetford account for the vast majority of OEM RV toilets installed by manufacturers. Their seals are brand-specific and not interchangeable. Using the wrong seal — even if it looks close — will cause leaks.
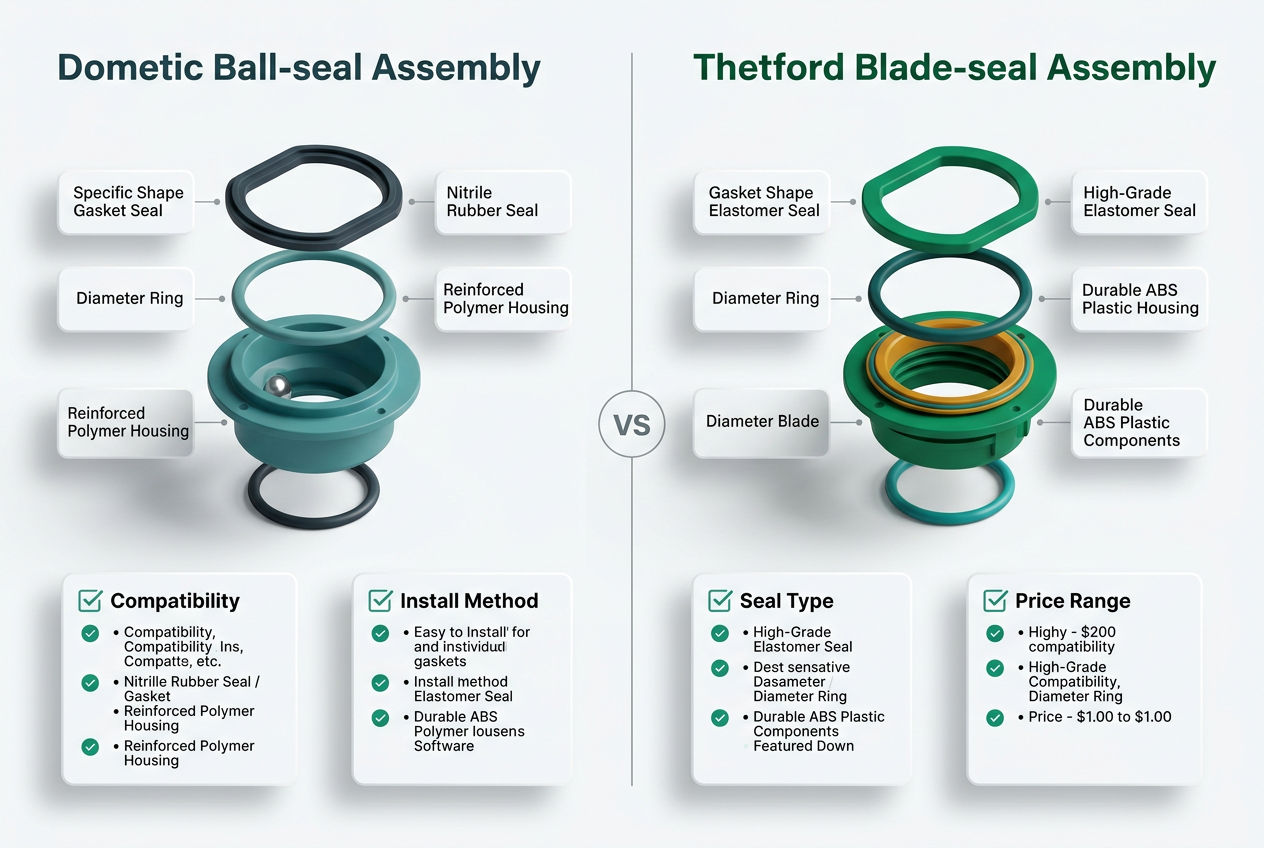
| Brand | Common Seal Part | Seal Type | Avg. Kit Cost | Notes |
|---|---|---|---|---|
| Dometic | 385311641 | Ball seal + base gasket | $18–$28 | Fits 300/310/320 series |
| Thetford | 31705 | Flange seal kit | $12–$22 | Fits Aqua-Magic V/VI |
| Thetford | 19220 | Base gasket only | $8–$14 | Older Style II models |
| Generic/OEM | Varies | Varies | $8–$15 | Verify fitment carefully |
| SeaLand/Sealand | 501225905 | Flange seal | $20–$35 | Marine/RV crossover |
Source: Manufacturer part catalogs; pricing reflects retail averages as of 2025.
Before ordering anything, flip your toilet lid and find the model number stamped on the inside of the bowl or on a label near the base. That number tells you exactly which seal you need. For a deeper comparison of these two brands, see our guide on Dometic vs. Thetford RV toilets.
What Tools and Materials Do You Need?
You need about five basic items — nothing that requires a hardware store trip if you keep a decent toolkit in your RV bay.
Tools:
- Adjustable wrench or ¼-inch ratchet
- Rubber gloves (non-negotiable)
- Old towels or shop rags
- Bucket or small tray
- Flathead screwdriver
Materials:
- Replacement rv toilet seal kit (brand-specific — see table above)
- RV-safe plumber's grease or petroleum jelly (to seat the new seal)
- Paper towels and a small container of clean water for cleanup
That's it. No torque wrench, no specialized plumbing tools. The flange bolts on most RV toilets tighten to hand-tight plus a quarter turn — overtightening cracks the base.
Do I Need to Empty the Black Tank Before Replacing the Seal?
Yes — completely. Not mostly empty. Not "close enough." The black tank needs to be at 0% and ideally flushed with a tank rinser before you start. If you lift the toilet with waste in the tank, you'll get splashback when the seal breaks the flange connection, and the job goes from unpleasant to miserable fast.
Here's the pre-work checklist:
- Dump the black tank at a proper dump station or campsite hookup
- Run a built-in tank flush or use a wand rinser through the toilet for 3–5 minutes
- Dump again until the water runs clear
- Close the dump valve
For step-by-step guidance on this part of the process, our article on how to empty your RV black tank covers the full procedure. For ongoing tank health after the repair, check out our RV black tank treatment guide.
Step-by-Step: How to Replace an RV Toilet Seal
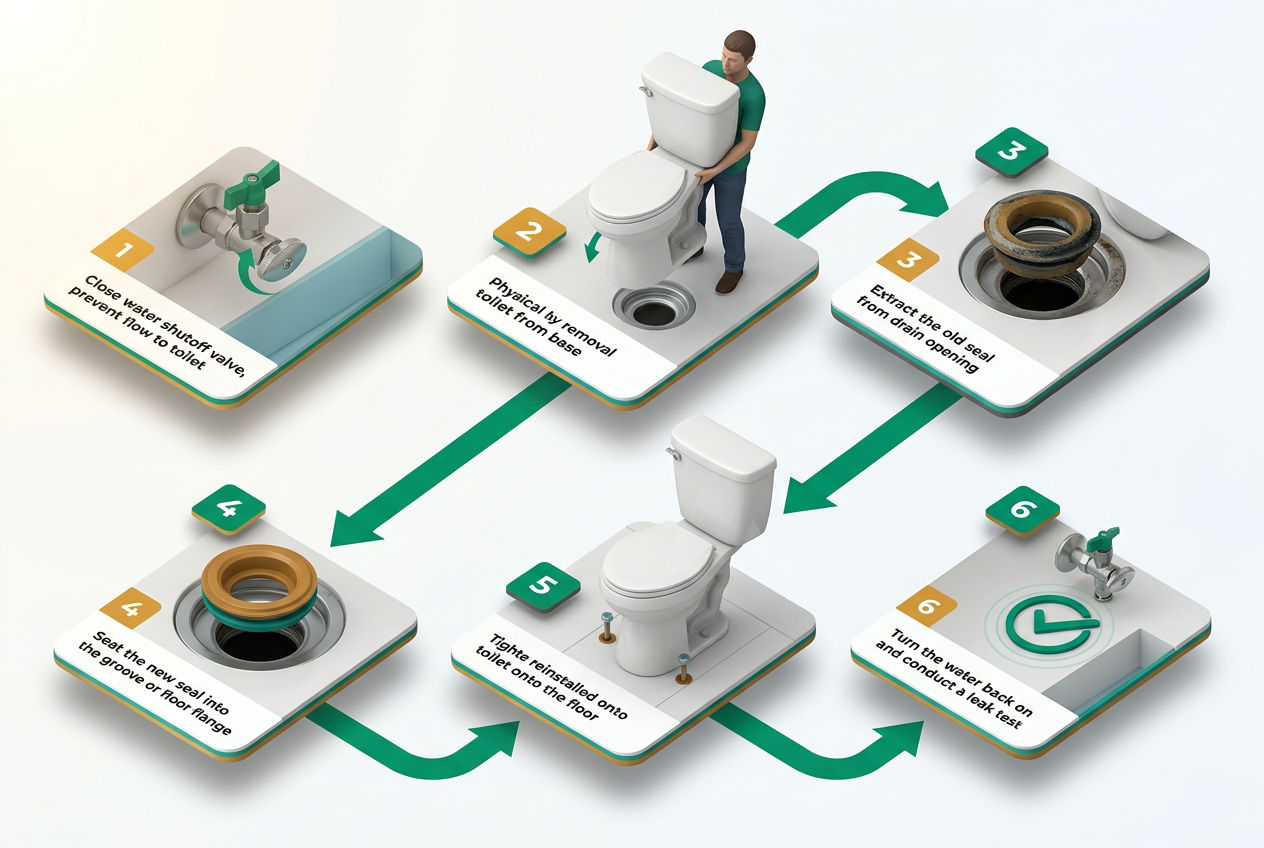
Step 1 — Shut Off the Water Supply
Find the water shutoff valve behind or beside the toilet. Turn it clockwise to close. Flush the toilet once to clear the water line pressure and empty any water sitting in the base. If your rig uses a demand pump, this also prevents the pump from cycling.
Step 2 — Disconnect the Water Line
Use your adjustable wrench to loosen the compression fitting connecting the water supply line to the toilet's inlet. Have a rag ready — a small amount of water will drip out. If the line is long enough, let it hang to the side. If it's short, you may need to disconnect it fully and set it out of the way.
Step 3 — Remove the Toilet
Most RV toilets are held to the floor with two bolts at the base — usually covered by plastic caps you can pop off with a flathead screwdriver. Some models use four bolts. Loosen the nuts counterclockwise. Once the nuts are off, grip the toilet bowl at the sides and lift straight up. Set the toilet on its side on a towel outside the bathroom — you need access to the bottom.
You'll see the old seal: a flat rubber ring, often dark and compressed flat, seated in a groove around the toilet's outlet collar.
Step 4 — Remove the Old Seal
Peel the old seal out of its groove. On Dometic 300 series toilets, the rv toilet ball seal is a rubber ball-shaped valve inside the bowl — you'll replace this along with the base gasket. On Thetford models, the seal typically sits in a channel at the base flange. Use a flathead screwdriver to work it out if it's stuck.
Wipe down the seating surface with a damp rag. Remove any residue, grit, or compressed rubber bits. A clean mating surface is the difference between a seal that lasts five years and one that leaks in six months.
Step 5 — Install the New Seal
Take your new seal from the rv toilet seal kit. Apply a thin layer of RV-safe plumber's grease around the seal's outer edge — this helps it seat evenly and prevents the rubber from tearing when you compress it during reinstallation.
Press the new seal firmly into its groove or channel. Run your finger around the entire circumference to confirm it's seated flat with no gaps or twisted sections. A twisted seal will leak on day one.
For Dometic models with an rv toilet ball seal replacement: insert the new ball valve into the bowl mechanism before reinstalling the toilet. Follow the diagram in your seal kit — the orientation matters.
Step 6 — Reinstall the Toilet
Lower the toilet straight down over the flange bolts. Press down with steady, even pressure — you should feel the seal compress slightly as the toilet base contacts the floor. Hand-tighten the nuts, then add a quarter turn with your wrench. Do not overtighten. The goal is a firm, even contact between the toilet base and the floor, not maximum torque.
Replace the plastic bolt caps.
Step 7 — Reconnect the Water Line and Test
Reconnect the water supply compression fitting hand-tight, then snug it with the wrench — again, no overtightening. Open the shutoff valve slowly. Let the bowl fill partially, then flush. Watch the base for 60 seconds. No water at the base and no odor means the seal is seated correctly.
If you see water, the seal is either twisted or not fully seated. Shut off the water, remove the toilet again, and reseat it. This is a common first-timer mistake — don't assume overtightening the bolts will fix a leaking seal. It won't.
What a successful repair looks like by the numbers: A new Thetford 31705 seal kit costs $16 at most RV supply retailers. The repair takes 45 minutes. Professional labor for the same job runs $100–$200 (typically 1 hour at $100–$150/hr shop rate, plus parts). That's a savings of $84–$184 for less than an hour of work — a straightforward cost case for doing it yourself.
How Often Should You Inspect Your RV Toilet Seal?
The Septic Owner's Handbook
Own a septic system? Get the manual nobody gave you.
How it works, the golden rules, the maintenance calendar, and a warning-signs decoder for every gurgle, smell, and wet spot — so small issues never become $15,000 ones.
Get the Handbook — $27 →Instant download · 250+ pages, 17 chapters + printable toolkit · Yours to keep foreverAccording to the Recreational Vehicle Industry Association (RVIA), preventive inspection of RV plumbing components — including toilet seals — is recommended annually for seasonal users and every six months for full-timers. That guidance aligns with what most RV technicians see in practice: seals that are caught early (compression-set but not yet cracked) can sometimes be re-lubricated and reseated rather than replaced entirely, saving both time and money.
A compression-set seal is one that has flattened permanently under load but hasn't yet cracked through. You can identify it by pressing a fingernail into the seal's cross-section — if the rubber doesn't spring back at all, it's compression-set and should be replaced before it cracks. If it springs back 50% or more, it still has service life remaining.
Inspection takes two minutes. Work it into your pre-trip checklist alongside checking tire pressure and testing smoke detectors. For a complete pre-trip inspection framework, see our RV maintenance checklist.
One honest limitation worth naming: Even if you follow every step correctly, seal longevity depends on factors outside your control. Cheap aftermarket seals — particularly unbranded kits sold on marketplaces without a stated part number — may use lower-durometer rubber that fails in 12–18 months rather than 3–5 years. Stick to OEM part numbers (Dometic 385311641, Thetford 31705) unless a third-party kit explicitly states it meets the same ASTM D2000 rubber compound specification. There's no workaround for a seal made from inferior material.
If you're dealing with related odor issues beyond the seal itself, our guide on eliminating RV bathroom odors covers ventilation, tank treatment, and valve maintenance as a complete system.
What Does It Cost to Have a Professional Replace an RV Toilet Seal?
Professional RV technicians charge $100–$200 for a toilet seal replacement, all-in. The breakdown typically looks like this: $12–$28 in parts plus one hour of labor at $80–$150/hr depending on your region and whether you're at a dealership service center or an independent mobile RV tech.
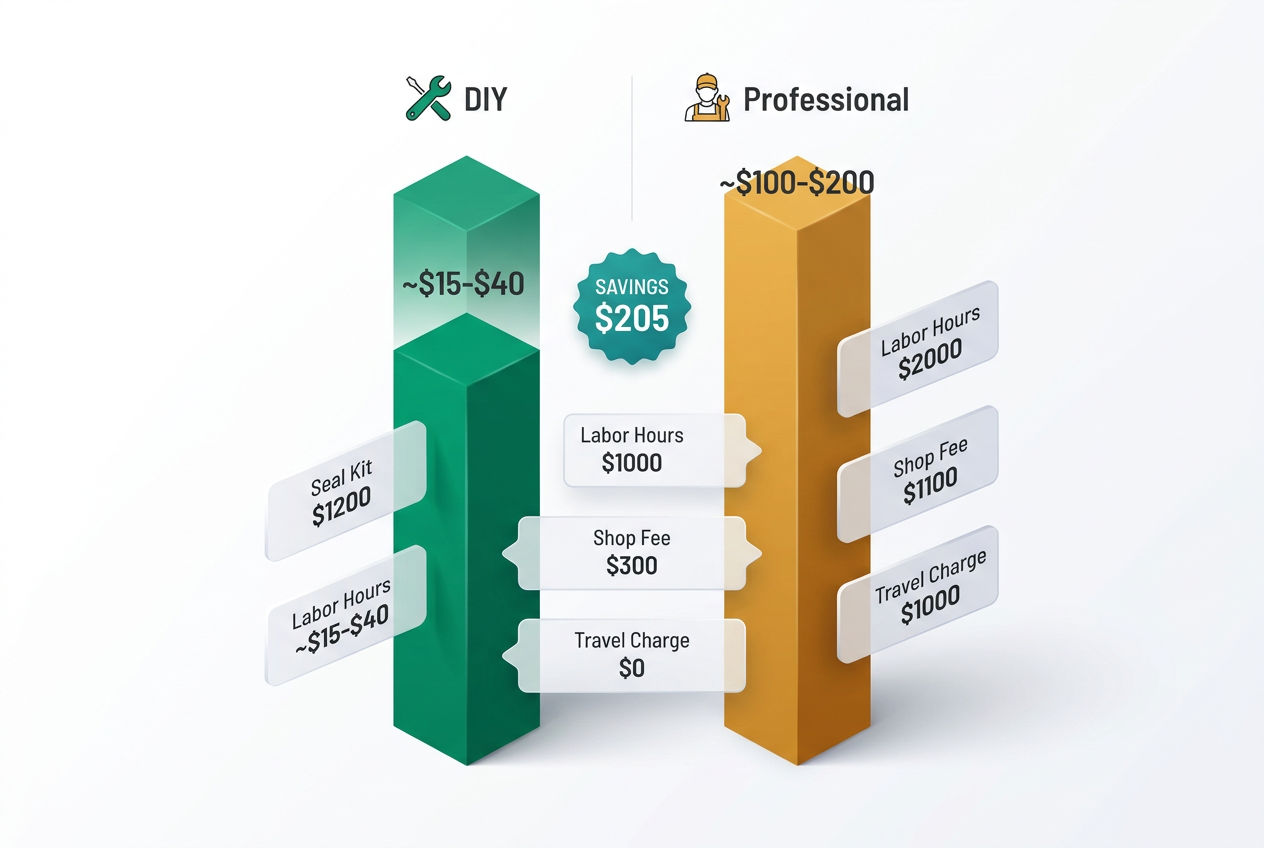
Mobile RV technicians — who come to your campsite or driveway — often charge a $50–$75 trip fee on top of their hourly rate, which can push the total toward $225–$250 for this particular repair. For a cost breakdown across common RV plumbing repairs, see our RV plumbing repair cost guide.
The math favors DIY clearly here. But there are two situations where paying for professional service makes sense: if your toilet is a high-end macerating unit (such as a Thetford Cassette or a Nature's Head composting toilet), the seal geometry is more complex and mistakes are costlier. And if your toilet is mounted over a slide-out, the floor flex dynamics can make proper seal alignment tricky without experience.
Frequently Asked Questions
How do I know which RV toilet seal fits my model?
The fastest way to find the correct rv toilet seal kit is to locate the model number on your toilet — it's usually stamped on the inside of the bowl rim or on a label at the base. Once you have that number, cross-reference it against the manufacturer's part catalog: Dometic's 300/310/320 series uses part 385311641, while Thetford's Aqua-Magic V and VI use part 31705. If your toilet is a SeaLand unit, look for part 501225905. Never buy a seal kit based on appearance alone — even seals that look dimensionally similar may use different durometer rubber or a slightly different groove profile that causes a slow leak within weeks. When in doubt, call the manufacturer's parts line directly with your model number. They can confirm compatibility in under two minutes and save you a second disassembly.
Can I replace just the rv toilet floor seal without replacing the ball valve?
Yes, in most cases you can replace the rv toilet floor seal — the rubber gasket at the base flange — without touching the ball valve inside the bowl. These are separate components with separate failure timelines. The base gasket handles the connection between the toilet and the black tank flange; the ball valve (on Dometic models) or the seat seal (on Thetford models) controls water retention in the bowl itself. That said, if your toilet is already disassembled and the ball valve shows signs of wear — cracking, stiffness, or failure to hold water — it makes practical sense to replace both at once. Dometic's 385311641 kit includes both components for $18–$28, so the incremental cost is minimal compared to doing the job twice. Inspect the ball valve when the toilet is on its side; replace it if you see any cracking along the equator of the rubber.
What causes an rv toilet seal to fail prematurely?
The three most common causes of premature rv toilet gasket failure are freeze-thaw cycling, UV exposure, and chemical damage from harsh tank treatments. In northern and mountain-region RVs, water trapped in the seal groove expands when it freezes, micro-cracking the rubber from the inside out — often without any visible surface damage until the seal leaks. In hot climates, sustained UV and heat exposure causes rubber oxidation that makes the seal brittle and prone to compression-set failure. Chemical damage is less common but real: concentrated bleach or non-RV-rated enzyme treatments can degrade the rubber compound over time. According to the RVIA's preventive maintenance guidelines, inspecting seals annually catches compression-set degradation before it becomes a leak. To extend seal life, use RV-safe enzyme treatments rated for rubber compatibility, and store your RV with the black tank fully drained so no moisture sits against the seal face during off-season storage.
How long does an rv toilet seal replacement take for a first-timer?
Most first-timers complete an rv toilet seal replacement in 30–60 minutes from start to finish, assuming the black tank is already empty and flushed before starting. The steps that take longest are disconnecting the water line (5–10 minutes if the compression fitting is corroded), removing the old seal (2–5 minutes if it's stuck in the groove), and verifying the new seal is seated without any twist before reinstalling the toilet. The actual installation of the new seal takes under five minutes. Where first-timers lose time is on the test-and-redo cycle: if the seal is even slightly twisted when you lower the toilet, you'll see water at the base on the first flush and need to start over. Budget 60 minutes for your first attempt and 20–30 minutes for any subsequent repair once you know the process.
Is there a difference between an rv toilet wax ring and a rubber seal kit?
Yes — and it's an important one. An rv toilet wax ring is a residential product designed for rigid, stationary floor flanges in houses. RV toilets use rubber seal kits specifically because rubber can absorb the continuous vibration, flexing, and road shock that would destroy a wax ring within a single travel season. Wax rings also don't adhere well to the ABS plastic and lightweight composite flanges used in RV construction. If a wax ring shifts even slightly during travel, it creates a gap that allows sewer gas and, eventually, liquid to bypass the seal entirely. The rv toilet seal kit — whether a Dometic 385311641 or a Thetford 31705 — uses a rubber compound rated for both compression and lateral movement, which is exactly what an RV environment demands. Never substitute a residential wax ring in an RV application, regardless of how similar the flange geometry looks.
How do I stop the rv toilet smell after replacing the seal?
If you're still getting an rv toilet black water smell after a successful seal replacement, the odor source is most likely one of three things: residual waste in the tank that wasn't fully flushed, a partially open or degraded dump valve blade, or a blocked roof vent pipe. A new seal eliminates sewer gas escaping at the base flange, but it doesn't address odors that originate inside the tank and travel up through the toilet bowl when the foot pedal is open. Start by running a full tank flush cycle, then treat the tank with an enzyme-based rv black tank treatment — not formaldehyde-based products, which are banned in many states under EPA wastewater discharge regulations. If the smell persists after treatment, climb onto the roof and inspect the vent pipe opening for debris blockage; a blocked vent creates negative pressure that pulls tank odors into the living space. For a complete odor troubleshooting process, see our guide on eliminating RV bathroom odors.
Sources
- Recreational Vehicle Industry Association (RVIA) — Preventive Maintenance Guidelines for RV Plumbing Systems
- Dometic Corporation — Part 385311641 Seal Kit Installation Manual (2023)
- Thetford Corporation — Aqua-Magic Series Service Manual, Part 31705 (2022)
- ASTM D2000 — Standard Classification System for Rubber Products in Automotive Applications
- Manufacturer retail pricing verified via Camping World, Amazon, and PPL Motor Homes (April 2025)
Was this article helpful?
Frequently Asked Questions
Recommended Resources
Find Septic Professionals Near You
Connect with licensed, verified septic companies in your area.