

Quick Answer
Building an outhouse on rural or off-grid property requires a pit depth of 3–6 feet, setbacks of 50–100 feet from drinking water wells, and a county health department permit costing $50–$300. Most DIY builds using pressure-treated lumber, T1-11 siding, and a 4-inch PVC vent pipe come in between $200 and $1,500 in materials — a fraction of conventional septic costs.
Key Takeaways
- Standard outhouse pit depth is 3–6 feet; never dig below 2 feet of your water table
- Minimum setback from a drinking water well is 50–100 feet (EPA recommends 100 ft)
- DIY outhouse construction costs $200–$1,500 in materials; permits add $50–$300
- A pit latrine serving a family of 4 lasts roughly 3–5 years before relocation
- Outhouses are broadly prohibited without a variance in Florida, New Jersey, and parts of California — check your county health department first
Published: June 10, 2025 · Updated: June 10, 2025
Meta description: Learn how to build an outhouse with step-by-step plans, pit depth requirements, setback rules, permit costs, and odor control tips. Covers DIY outdoor toilet construction for rural cabins and off-grid properties.
Is It Legal to Build an Outhouse on Your Property?
Legality depends entirely on your state and county. There is no single federal rule that allows or prohibits outhouses — the EPA provides environmental guidance, but enforcement happens at the state and local level.
Here's the practical breakdown:
- Rural counties in Montana, Wyoming, Idaho, Vermont, Maine, and most of the Midwest often allow pit latrines on private land with minimal permitting, especially when no municipal sewer connection is available and the lot is large enough to meet setback requirements.
- Florida prohibits traditional pit latrines statewide due to the exceptionally high water table — in some coastal areas the water table sits just 2–3 feet below grade. If you're in Florida, a composting toilet alternative is your most practical path.
- New Jersey requires a variance for any privy installation; outhouses are effectively prohibited for new construction in most situations.
- California regulates outhouses under Title 17 of the California Code of Regulations, with county environmental health departments having final authority. According to the California Department of Public Health's guidance under Title 17, rural mountain counties sometimes issue permits; coastal and Bay Area counties almost never do.
The safest first move? Call your county health department and your local zoning office — two separate calls, because zoning and health codes are administered independently. Ask specifically about "pit latrine permits" or "non-flush toilet permits." Some jurisdictions call them privies in their code language; use that word if needed.
⚠️ Check Local Codes First: State-level generalizations can be wrong at the county level. One rural Colorado county may permit a pit latrine freely while an adjacent county requires a full perc test. Your county health department is the authoritative source — not this guide, not a neighbor, not a forum post.
If your property already has a traditional septic system, you may not need an outhouse at all — but for remote parcels without infrastructure, a properly built privy beats an improvised outdoor toilet every time.
How Much Does It Cost to Build an Outhouse?
A basic DIY outhouse costs $200–$1,500 in materials, depending on size, finish level, and whether you hire out the excavation. Here's how those numbers break down:
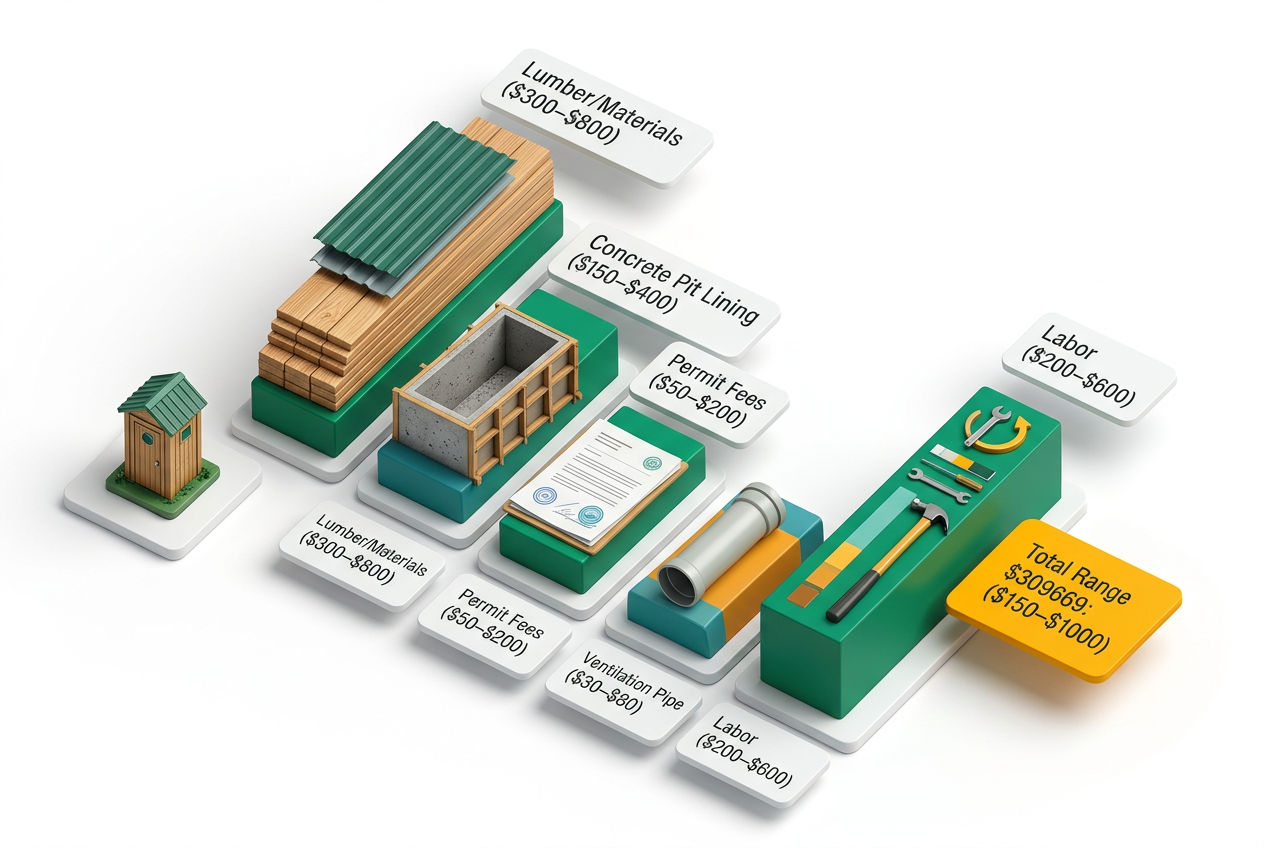
| Build Type | Material Cost | Labor Cost | Permit Cost | Total Estimate |
|---|---|---|---|---|
| DIY Basic (rough lumber) | $200–$500 | $0 (self-built) | $50–$150 | $250–$650 |
| DIY Mid-Range (pressure-treated, painted) | $500–$1,000 | $0–$300 (excavation) | $100–$300 | $600–$1,300 |
| Pre-Built Kit | $1,500–$3,500 | $500–$1,000 (delivery/set) | $100–$300 | $2,100–$4,800 |
| Contractor-Built | Included | $3,000–$8,000 | $100–$300 | $3,100–$8,300 |
Source: Contractor estimates compiled from rural homebuilding forums, HomeAdvisor national data, and regional lumber pricing as of 2025.
Worked example: A 3×4-foot outhouse in rural Wisconsin using pressure-treated 4×4 posts, T1-11 siding, a metal roof, a plastic toilet seat, and a 4-inch Schedule 40 PVC vent pipe runs approximately $650–$850 in materials if you rent a mini excavator for the pit ($200–$350/day). Add a $150 county health permit and you're under $1,000 all-in. The same build in Oregon or Washington typically runs $100–$200 higher due to regional lumber pricing differences in the Pacific Northwest.
Compare that to full septic system installation costs, which typically run $10,000–$25,000 for a conventional drain field system. For a seasonal hunting cabin used 30 days a year, the outdoor toilet math is hard to argue with — if local codes allow it.
What Are the Setback Requirements for an Outhouse?
Setback requirements define the minimum distance your outhouse must sit from water sources, property lines, and structures. These are not suggestions — they're the regulatory foundation for preventing groundwater contamination from fecal bacteria.
Standard setback minimums (verify with your county):
- Drinking water well: 50–100 feet minimum. According to EPA guidelines, 100 feet is the recommended minimum. Fecal coliform bacteria can travel up to 100 feet horizontally through sandy or loamy soil — which is exactly why this number exists.
- Surface water (streams, ponds, wetlands): 50–200 feet depending on jurisdiction. States with strong environmental regs (Oregon, Washington, Vermont) sit toward the 200-foot end.
- Property lines: Typically 5–10 feet, though some counties require 25 feet.
- Your home or other structures: Usually 10–20 feet minimum.
- Existing septic drain field: Stay at least 50 feet away to avoid leach field contamination risks.
These numbers assume a properly constructed pit with undisturbed, moderately permeable soil. If your soil is extremely sandy or fractured rock is near the surface, contamination risk increases dramatically — and your county may require greater setbacks or deny the permit entirely.
How Deep Does an Outhouse Pit Need to Be?
The standard pit depth is 3–6 feet. The 6-foot maximum exists for a critical reason: you must maintain at least 2 feet of unsaturated soil between the bottom of the pit and the seasonal high water table. Digging deeper than necessary doesn't help — it increases the risk of hitting groundwater.
In areas where the water table sits close to the surface (like much of the Southeast and coastal regions), even a 3-foot pit may be prohibited.
Pit capacity rule of thumb: plan for approximately 1 cubic foot per person per year of use. Here's how the numbers work in practice: a family of 4 using the privy as a primary toilet generates 4 cubic feet of waste annually. A standard 3×4-foot pit dug 5 feet deep yields 60 cubic feet of usable capacity (3 ft × 4 ft × 5 ft = 60 cu ft). At 4 cubic feet per year, that's 15 years of theoretical capacity — but in practice most pits need relocation in 3–5 years because decomposition slows as the pit fills and anaerobic conditions develop, reducing effective capacity well before the pit is geometrically full.
For a seasonal hunting cabin with 4 people using it 10 weekends per year (roughly 20 person-days annually), annual waste generation drops to about 0.22 cubic feet — meaning that same 60-cubic-foot pit could last 20+ years before relocation.
Outhouse Plans and Dimensions
Here are the construction specs you need before you buy a single board:
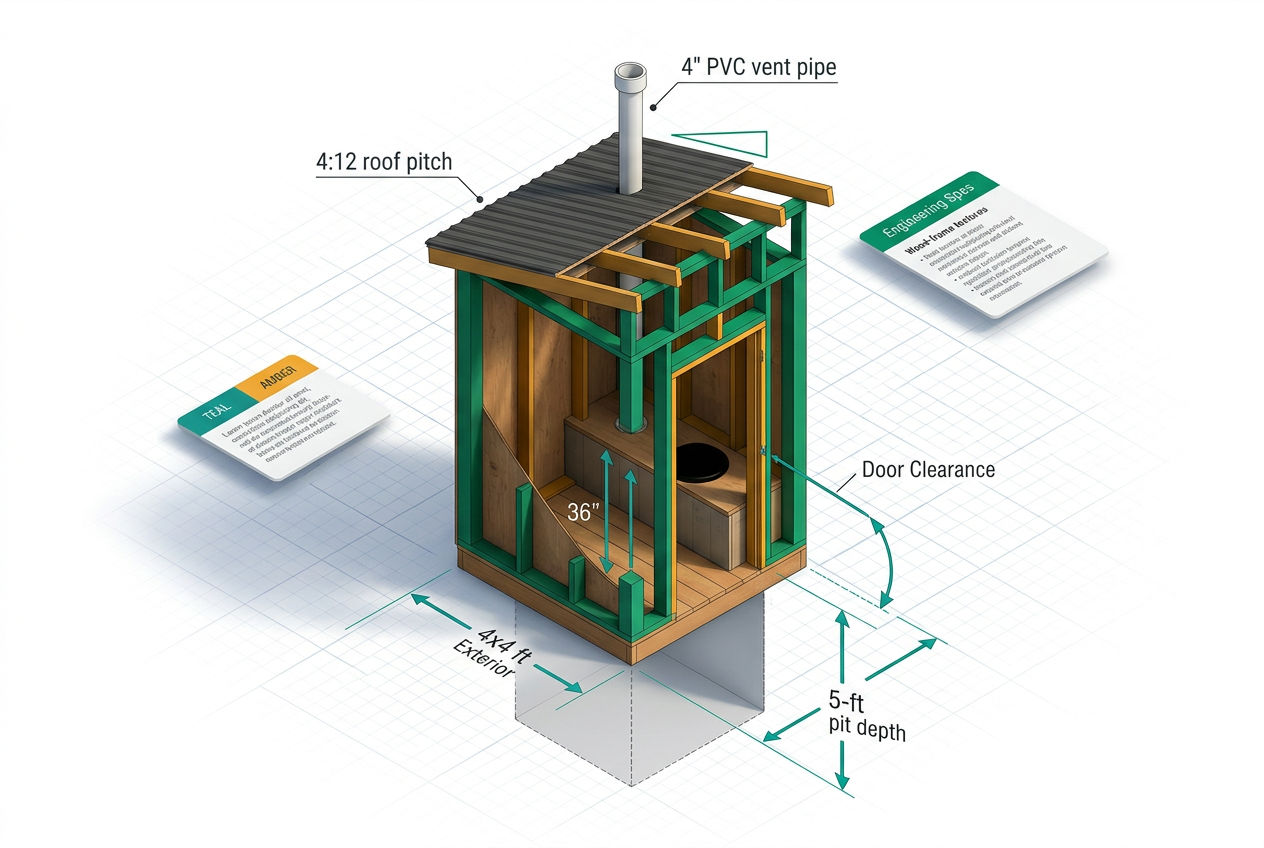
Pit dimensions:
- Minimum interior pit size: 3 feet × 4 feet (larger is better for longevity)
- Depth: 3–6 feet (6 feet maximum)
Structure dimensions:
- Minimum interior floor space: 3 feet × 4 feet (36" × 48")
- Wall height: 7 feet is comfortable; 6 feet works for a simple build
- Door width: 28–32 inches
- Roof pitch: 4:12 minimum for adequate water runoff; 6:12 is better in snow country
Seat box dimensions:
- Seat height from floor: 17–19 inches (matches ADA-comparable comfort standards)
- Seat hole diameter: 10–12 inches
- Seat box depth: 12–16 inches to allow airflow from pit to vent pipe
Ventilation pipe:
- Diameter: 4-inch PVC minimum (Schedule 40)
- Height: Extends 12–24 inches above the roofline
- Placement: On the sunny side of the structure so solar heat creates an updraft that pulls odors out of the pit
The vent pipe is the single most critical odor-control component in any backhouse or privy design. A properly installed vent creates negative pressure inside the pit — odors travel up and out rather than into the seating area. Pair it with a fly screen (standard window screen mesh) fitted at the top of the vent pipe opening to prevent insects from entering. Replace the fly screen annually; UV exposure degrades standard mesh in 12–18 months.
Step-by-Step Outhouse Construction Guide
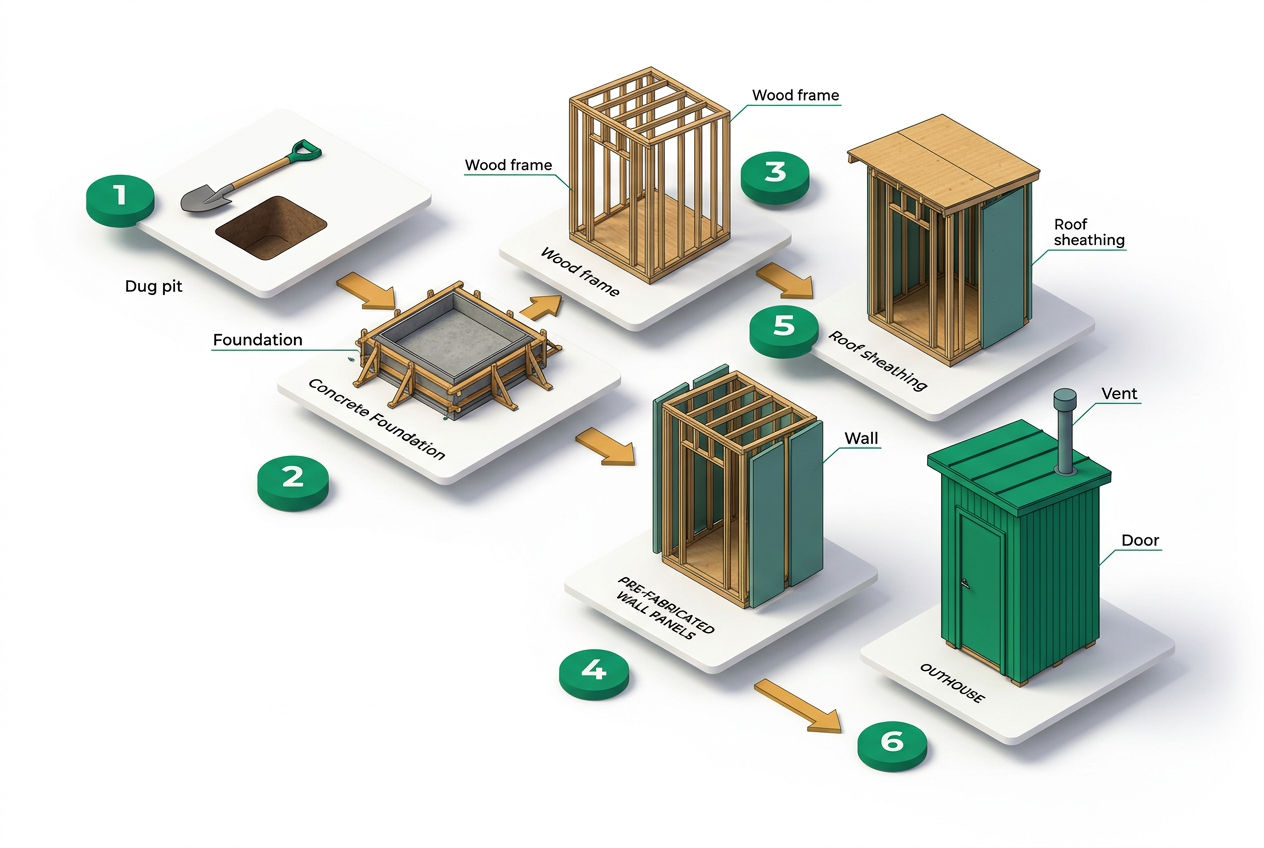
Step 1: Get Permits and Choose Your Site
Before you dig, confirm permit requirements with your county health department. Permit costs range from $50–$300 in most jurisdictions. Choose a site that:
- Meets all setback requirements
- Has access for future relocation (3–5 years out)
- Is downhill and downwind from your home
- Has stable, moderately permeable soil (not solid clay, not pure sand)
Step 2: Dig the Pit
Rent a mini excavator ($200–$350/day) or hire an excavation contractor for a 3×4-foot, 5-foot-deep pit. Have the spoil dirt piled nearby — you'll need it to backfill when the pit is relocated later.
Dig in spring when the ground has thawed, you can assess soil conditions clearly, and you'll have the structure ready before summer fly season. Avoid digging in frozen ground — you won't get accurate depth or see soil layers properly.
Step 3: Install Corner Posts and Floor Frame
Use 4×4 pressure-treated lumber (ground-contact rated, UC4B or UC4C designation) for corner posts. Set posts 18–24 inches deep in concrete at each corner of the structure. UC4B is the minimum for ground contact in most climates; UC4C is recommended for permanently wet or soil-contact applications in humid regions.
Frame the floor using 2×6 pressure-treated joists, spaced 16 inches on center. The floor frame should cantilever over the pit opening on all four sides, leaving a pit access opening of approximately 20×28 inches centered under the seat box location.
Step 4: Build the Walls
Standard wall framing uses 2×4 studs at 16-inch spacing. T1-11 plywood siding (5/8-inch thickness) works well for outhouse construction — it's a single-layer wall-and-siding product that goes up fast and holds up well when painted. Use exterior-grade paint with a mildew-resistant additive.
Provide a small ventilation gap or louvered vent near the peak of the rear wall, opposite the door. This secondary ventilation supports the vent pipe's negative pressure effect.
Step 5: Frame and Install the Roof
A gable roof with a 4:12 to 6:12 pitch suits most outhouse builds. Use 2×4 rafters, OSB sheathing, and 30-lb felt underlayment. Metal roofing (corrugated steel or standing seam) is the preferred choice — it lasts 40+ years with minimal maintenance and handles heavy snow loads better than asphalt shingles on a small structure.
Extend the roof overhang at least 12 inches on all sides to keep rain off the walls and away from the pit opening perimeter.
Step 6: Build the Seat Box and Install the Vent Pipe
Build the seat box from 3/4-inch exterior plywood. The box should sit 17–19 inches off the floor and fully enclose the pit access opening except for the seat hole. Use a jigsaw to cut a 10–12-inch diameter seat hole, then sand the edges smooth and apply two coats of exterior paint or polyurethane to prevent moisture absorption.
For the vent pipe: drill a 4.5-inch hole through the seat box and floor frame, insert a 4-inch Schedule 40 PVC pipe, and run it up through the roof, extending 12–24 inches above the ridge. Seal around the pipe penetration with roofing flashing and silicone caulk. Cap the top of the vent pipe with a fly screen — a standard hardware cloth or window screen cut to fit and secured with a hose clamp works well.
Paint the exposed vent pipe section flat black. The dark color absorbs solar heat, warming the air inside the pipe and strengthening the upward airflow that carries odors out of the pit. This detail separates a comfortable outhouse from one that smells within 20 feet.
Step 7: Install the Door and Hardware
A 28–30-inch door on a simple Z-brace frame is the standard for outhouse construction. Use exterior-grade hinges (stainless or galvanized) and a simple barrel bolt or hook-and-eye latch on the interior. A crescent moon or other decorative vent cutout on the upper door panel is functional as well as traditional — it provides passive ventilation and a small amount of interior light.
Consider a simple spring-loaded door closer to ensure the door stays shut. An open door disrupts the vent pipe's negative pressure and increases insect entry.
Step 8: First Use and Ongoing Maintenance
Before first use, add a 4–6 inch base layer of wood ash, sawdust, or agricultural lime (such as Hi-Yield Calcium Carbonate Lime, available at most farm supply stores for $8–$12 per 50-lb bag) to the bottom of the pit. This initial layer jumpstarts the decomposition process and reduces odor from the first use.
Ongoing maintenance:
- Add 1 cup of agricultural lime or wood ash after each use cycle (weekly for regular use)
- Keep the seat box lid closed when not in use
- Inspect the fly screen quarterly; replace annually
- Post a small instruction card inside for guests: "Add one scoop of lime after use"
How Long Does an Outhouse Last Before It Needs to Be Moved?

DIY Septic Blueprint
Thinking about building it yourself?
The complete, plain-English plan to size, permit and install your own septic system — designed for homeowners, not contractors. Skip the $15,000–$25,000 quotes and do it right the first time.
Get the DIY Blueprint — $67 →Instant download · 8 modules + 3 bonus guides · 60-day money-back guaranteeA pit latrine serving a family of 4 as a primary toilet typically needs relocation in 3–5 years. The calculation above (60 cubic feet ÷ 4 cubic feet per year) suggests a theoretical 15-year lifespan, but real-world performance is shorter because:
- Anaerobic decomposition slows significantly as the pit fills past 50% capacity
- Wet seasons raise the effective water table temporarily
- Heavy use periods (holidays, guests) create disproportionate volume
When the pit reaches within 12–18 inches of the surface, it's time to relocate. The relocation process involves:
- Choosing a new site that meets all setback requirements
- Digging a new pit before decommissioning the old one
- Moving the structure to the new pit (most outhouse structures are designed to be skidded or lifted off their base)
- Backfilling the old pit with the stored spoil dirt, mounding slightly to account for settling
- Marking the old pit location so it isn't accidentally excavated
Some counties require notification of pit closure; check with your health department when you pull the original permit.
What Are the Best Odor Control Methods for an Outhouse?
If you've ever used a badly maintained outdoor toilet or thunder box, you know exactly what we're trying to avoid. The good news: a properly built and maintained outhouse with an effective vent pipe and regular lime treatment should have minimal detectable odor at the seat.
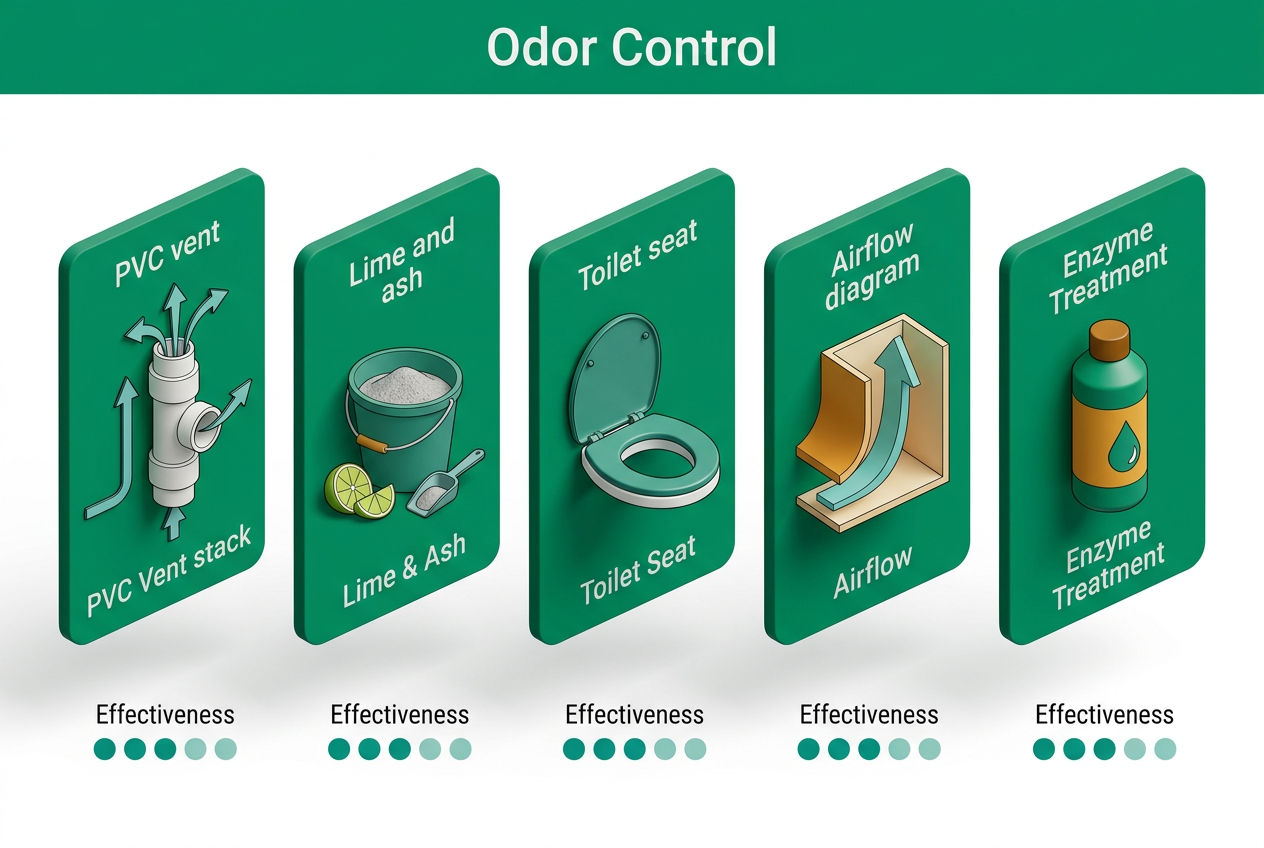
Ranked by effectiveness:
-
Proper vent pipe installation — The foundation. Black-painted 4-inch Schedule 40 PVC extending above the roofline, positioned on the sunny side of the structure. No other treatment fully compensates for a missing or undersized vent.
-
Agricultural lime (calcium carbonate) — According to the University of Minnesota Extension's guidance on rural sanitation, lime raises pit pH, which inhibits odor-producing anaerobic bacteria. Use 1 cup per use cycle. Hi-Yield Calcium Carbonate Lime runs $8–$12 per 50-lb bag at farm supply stores. A 50-lb bag lasts a family of 4 roughly 6–8 weeks of regular use.
-
Wood ash — A free alternative to lime for wood-burning households. Provides similar pH elevation and some moisture absorption.
-
Carbon-based cover materials (sawdust, peat) — Useful for moisture control and fly deterrence; less effective for odor than lime but good as a supplemental treatment.
-
Enzyme treatments — Products marketed for RV holding tanks (such as Walex Bio-Pak) can accelerate decomposition when added monthly. At $15–$25 per package of 10 treatments, the cost is manageable for seasonal use.
What doesn't work: chemical deodorizers that mask rather than neutralize. They're expensive, wear off quickly, and do nothing to improve decomposition rates.
When to Call a Professional Instead
Some outhouse projects are genuinely beyond DIY scope. Hire a contractor or licensed sanitarian if:
- Your water table is within 4 feet of the surface and you're not sure if a privy is viable at all
- Your county requires a soil perc test or licensed soil evaluator sign-off as part of the permit
- You need the structure to meet ADA accessibility requirements (grab bars, turning radius, threshold height)
- Your property has a complex setback situation requiring a variance hearing
A licensed contractor familiar with your county's septic system permit requirements will navigate the variance process faster than you will on your own. For off-grid properties where an outhouse isn't viable, review your off-grid toilet options or compare a composting toilet vs. septic system before committing to either.
If you eventually sell the property, a septic system checklist for rural property will help you document sanitation infrastructure for disclosure purposes.
For full permanent sanitation infrastructure, contact a septic installation professional who can assess whether a conventional system, alternative system, or permitted privy makes the most sense for your parcel.
Frequently Asked Questions About Building an Outhouse
Do I need a permit to build an outhouse or backyard latrine?
Yes, in most jurisdictions you need a permit from your county health department before constructing an outhouse, pit latrine, or any non-flush outdoor toilet. The permit process typically involves submitting a site plan showing setback distances from wells, surface water, and property lines, and sometimes a soil evaluation. Permit costs range from $50 to $300 depending on your county. Some rural counties in states like Montana, Wyoming, and Maine have streamlined processes that can be completed in a few days; others require inspections before and after pit excavation. A few jurisdictions — notably Florida and New Jersey — effectively prohibit new pit latrines entirely and require a variance to even apply. The safest approach is to call your county health department and ask specifically about "pit latrine permits" or "privy permits" before purchasing any materials. Your local zoning office is a separate call, since zoning and health codes are administered independently.
How far does an outdoor toilet need to be from a well or drinking water source?
According to EPA guidelines, an outhouse or pit latrine should be positioned a minimum of 100 feet from any drinking water well, with a hard floor of 50 feet in lower-risk soil conditions. Fecal coliform bacteria have been documented traveling up to 100 feet horizontally through sandy or loamy soil under normal conditions — which is the basis for the EPA's 100-foot recommendation. Surface water setbacks are typically 50–200 feet depending on your state; Oregon, Washington, and Vermont sit at the stricter end of that range. Property line setbacks are usually 5–25 feet, and separation from existing septic drain fields should be at least 50 feet to avoid cross-contamination. These are minimums — if your soil is extremely porous, fractured, or has a high clay content that channels water unpredictably, your county may require greater distances or deny a permit entirely. Always verify the specific numbers with your county health department, not online generalizations.
What is the difference between an outhouse, a privy, a pit latrine, and a thunder box?
These terms all describe the same basic structure with slight regional and contextual differences. "Outhouse" is the common American term for a small outdoor toilet structure built over an excavated pit. "Privy" is the older English term still used in many state and county health codes — if your county's regulations reference privies, they mean the same thing as an outhouse. "Pit latrine" is the technical public health term used by the EPA, WHO, and state environmental agencies; it emphasizes the excavated pit rather than the structure above it. "Thunder box" is an informal term common in Australia, Canada, and among military and camping communities — it typically refers to a portable or field-expedient version rather than a permanent structure. "Backhouse" is an older regional American term. For permit applications, use "pit latrine" or "privy" — whichever term appears in your county's code — to avoid confusion with health department staff.
Can I build an outhouse next to my well if the well is cased?
A cased well reduces contamination risk compared to a shallow dug well, but it does not eliminate it — and it does not change the regulatory setback requirements. According to the EPA's wellhead protection guidelines, the 100-foot setback from a drinking water well applies regardless of whether the well is cased, because surface bacteria can migrate through soil before reaching the well screen depth, particularly during heavy rainfall events that temporarily raise the water table. Some county health departments will consider reduced setbacks (down to 50 feet) for properly cased wells in low-permeability soils if supporting documentation is provided, but this requires a formal variance application and typically a soil evaluation. In practice, if your well and the only viable outhouse site are within 100 feet of each other, your best path is to consult your county sanitarian about alternatives — including composting toilets or vault privies — rather than attempting to build a pit latrine at a noncompliant distance.
How do I control flies and odors in an outdoor toilet or pit latrine?
Effective fly and odor control in an outhouse requires three things working together: a properly installed vent pipe, a tight-fitting seat lid, and regular lime treatment. The 4-inch Schedule 40 PVC vent pipe, painted flat black and extending 12–24 inches above the roofline on the sunny side of the structure, creates negative pressure that draws odors up and out of the pit. A fly screen (standard window mesh) fitted at the top of the vent pipe prevents insects from entering while allowing airflow. Add 1 cup of agricultural lime — such as Hi-Yield Calcium Carbonate Lime ($8–$12 per 50-lb bag at farm supply stores) — after each use cycle. According to University of Minnesota Extension guidance on rural sanitation, lime raises pit pH and suppresses the anaerobic bacteria responsible for most odor production. Keep the seat lid closed when not in use, as an open seat hole bypasses the vent system entirely. Replace the fly screen annually — UV exposure degrades standard mesh within 12–18 months.
Sources & Methodology
-
U.S. Environmental Protection Agency — Onsite Wastewater Treatment Systems Manual (EPA/625/R-00/008). Used for setback distance recommendations, groundwater contamination risk data, and wellhead protection guidance. epa.gov
-
California Department of Public Health — Title 17, California Code of Regulations, Division 1, Chapter 5. Used for California-specific regulatory context on pit latrine permitting. cdph.ca.gov
-
University of Minnesota Extension — Pit Privies and Outhouses: Rural Sanitation Guide. Used for lime treatment efficacy, decomposition rate data, and pit capacity guidance. extension.umn.edu
-
HomeAdvisor / Angi — National contractor cost data for excavation and outhouse construction. Used for labor cost ranges in the cost table. Current as of 2025. angi.com
-
American Wood Protection Association (AWPA) — Use Category System for Preservative-Treated Wood. Used for UC4B/UC4C lumber designation guidance. awpa.com
All regulatory figures cited in this article reflect general guidance. Local codes supersede any figures cited here. Verify all setbacks, pit depth limits, and permit requirements with your county health department before beginning construction.
Was this article helpful?
Frequently Asked Questions
Recommended Resources
📖 Related Articles
- Composting Toilets: The Complete Guide (How They Work + Best Models)
- What Is a Septic System? How It Works (Visual Guide)
- High Water Table and Septic Systems: What You Need to Know
- What Is a Drain Field? (And How Does It Work?)
- Septic System Permit Cost & State Requirements (2026 Guide)
- The Best Off Grid Toilet (Top Picks)
- Composting Toilet vs. Septic System: Which Is Right for You?
- Buying Rural Property? Septic System Checklist
🔧 Services
Find Septic Professionals Near You
Connect with licensed, verified septic companies in your area.